Hospital-at-home programs have expanded rapidly across the U.S., but most patients have no idea this option exists when facing admission.
When my husband George was cycling through hospital stays every month for his end-stage renal disease and cancer in 2018, nobody told us there might be another way. We assumed the hospital was our only option. Month after month, we dealt with the ER waits, the uncomfortable chairs, the sleepless nights, and the parade of specialists who never seemed to talk to each other.
Things have changed since then. Hospital-at-home care has gone from experimental to mainstream. Medicare now covers it permanently. Your insurance probably covers it too.
But you have to know to ask for it.
Let’s break down everything you need to know about hospital-at-home versus traditional hospitalization, including:
a comparison of clinical outcomes
the hidden costs nobody talks about
how to decide which option makes sense for your situation
Hospital-at-home means exactly what it sounds like: you receive acute-level medical care in your own home instead of in a hospital facility. This isn’t the same as regular home healthcare or skilled nursing. We’re talking about the same intensity of care you’d get if you were admitted to a hospital bed.
What conditions qualify for hospital-at-home care?
The key word here is “acute.” You need to be sick enough to require hospitalization, but stable enough to be safely monitored at home.
What does hospital-level care actually include?
Your care team visits you at home daily, and sometimes twice a day. This includes physicians, nurses, physical therapists, and care coordinators. You’ll get IV medications if you need them. You’ll wear devices that monitor your vital signs and send data to your medical team in real-time. It’s like having a hospital room set up in your living room, but without the hospital smell and terrible food.
When George was using his Dexcom continuous glucose monitor, I got alerts on my phone whenever his blood sugar spiked or dropped dangerously low. That technology exists for heart rate, oxygen levels, blood pressure, and more. Your care team watches these numbers from their computers and can intervene before small problems become emergencies.
Who provides the care?
A dedicated hospital-at-home team manages your case. You’ll have a primary physician who oversees your treatment plan. Nurses visit to check on you, administer medications, and assess your condition. The big difference from traditional home health? These visits happen daily, and you have 24/7 access to your care team by phone or video.
When you’re admitted to a traditional hospital, you check in through the emergency department or for a scheduled admission. A nurse takes your vitals, you change into a hospital gown, and you’re assigned to a room (if one’s available—sometimes you wait for hours).
The hospital routine
Nurses check your vitals every few hours, day and night. Yes, even at 3 a.m. Doctors round in the morning, usually between 7 and 10 AM. If you’re asleep when they come by, too bad. Meals arrive on a fixed schedule whether you’re hungry or not.
With George’s 10 different specialists, we never knew who would walk through the door or when. His nephrologist didn’t talk to his oncologist. His endocrinologist had no idea what his cardiologist prescribed. I became the central hub of information, keeping my own spreadsheet because the hospital’s electronic records didn’t seem to connect the dots.
Family involvement and visiting limitations
Even before COVID-19 restrictions, hospitals limited visiting hours. During the pandemic, many hospitals banned visitors entirely. In 2025, most facilities still have restrictions like limited hours, limited number of visitors, no children under 12.
If you want to be there when doctors round to ask questions, you’d better arrive early and stay all day.
Need to go home to shower or check on your kids? You might miss critical conversations about your loved one’s treatment plan.
That’s not surprising. People sleep better when they’re in their own beds. They get to eat their own food, and see their family members whenever they want.
The medical care is just as good, but the experience is dramatically better.
Hospital readmission rates
Getting sent back to the hospital within 30 days of discharge is a sign something went wrong.
That’s because closer monitoring catches problems earlier. Patients understand their care plan better because they’re not overwhelmed and sleep-deprived. The transition from acute care to regular life is smoother when you’re already home.
The mortality rates? Comparable. For appropriate patients, hospital-at-home is just as safe as traditional hospital care.
The Hidden Costs Nobody Tells You About
The hospital bill is just the beginning. Let’s talk about what you’ll actually pay and what costs don’t show up on an invoice.
Out-of-pocket expenses for traditional hospitalization
Even with good insurance, a three-day hospital stay can cost you $1,500 to $3,000 in co-pays and deductibles. That’s the baseline. Then come the surprise charges.
Facility fees can add hundreds of dollars:
Labs processed by an out-of-network pathologist costs extra.
And let’s not forget parking. $15 per day adds up when you’re visiting daily for weeks. Hospital cafeteria meals for family members is $10 to $15 each.
These “small” costs can easily hit $500 to $1,000 for a typical hospital stay.
Out-of-pocket expenses for hospital at home
Medicare covers hospital-at-home the same way it covers traditional hospitalization. You pay the standard hospital deductible and any applicable co-pays. Most private insurers follow Medicare’s lead, but coverage varies.
The surprise? Hospital-at-home often costs you less out-of-pocket because there’s no:
You might need to buy a few things—maybe a shower chair or grab bars if you don’t have them. But the program provides equipment like IV poles and monitoring devices.
The invisible costs for caregivers
The economic impact on caregivers is often overlooked. I burned through my vacation days and sick leave taking George to appointments and managing his care, even while working remotely. Many caregivers do the same.
Both hospital settings require serious caregiver involvement, just in different ways.
Caregiving during traditional hospitalization
You become an advocate and information manager. When doctors round at 8 a.m. and you can’t be there because you have a job, you miss critical conversations. So you take time off. You show up early. You stay late.
I kept notes from every specialist visit, cross-referenced medications, and flagged contradictions. The nutritionist told George to eat high-protein foods for his kidney disease. The renal dietitian told him to eat low-protein foods for his kidney disease. Guess who had to figure that out?
You’re also managing communication with the rest of the family. Who’s visiting when? Who needs updates? Coordinating schedules becomes a part-time job.
Caregiving with hospital at home
At home, you’re more hands-on with daily care:
You help your loved one to the bathroom.
You make sure they eat.
You learn to manage medications (when to give them, and spot side effects)
The medical team trains you. They don’t just hand you a list of tasks and disappear. They show you how to help with care, what to watch for, and when to call for help.
When I was managing George’s peritoneal dialysis at home, his nephrologist’s team trained me thoroughly. I set up the machine every night, monitored the process, troubleshot issues.
It was a big responsibility, but I wasn’t alone. I had 24/7 access to the dialysis team by phone.
The benefits of hospital-at-home care:
You have more control over the environment
You can maintain some routine
You sleep in your own bed
The stress of feeling “on call” is real, but many caregivers prefer it to feeling helpless in a hospital where they can’t be present all the time.
How to Know if Hospital at Home is Right for Your Situation
Hospital-at-home isn’t for everyone. Here’s how to figure out if it makes sense for you.
Medical eligibility criteria
Your condition needs to be serious enough to require hospitalization but stable enough to monitor at home. This includes conditions like:
Pneumonia (non-ICU level)
Heart failure exacerbations
COPD flare-ups
Cellulitis and other serious infections
Certain post-surgical recoveries
You don’t qualify if you need ICU-level care, constant monitoring, or procedures that can only be done in a hospital. You also need to live within 30 minutes of the hospital in case you need emergency transfer.
Home environment assessment
You need a space for medical equipment, like a corner where an IV pole can stand and monitoring equipment can plug in.
If you’re taking advantage of telehealth, you’ll also need reliable internet for video visits and data transmission and a phone.
Safety matters too. Can you get to the bathroom safely? Are there trip hazards that could cause falls? A nurse will assess your home before admission to make sure it’s appropriate.
Insurance coverage check
Call your insurance company and ask these specific questions:
“What’s my co-pay compared to traditional hospitalization?”
“Do I need pre-authorization?”
“Which hospitals in my area participate in your hospital-at-home network?”
Get the answers in writing. Insurance representatives make mistakes, and you don’t want surprises later.
Family readiness factors
Someone needs to be home or nearby. Not necessarily 24/7, but available. The medical team handles the clinical care, but you need a person there to help with activities of daily living and to be present during visits.
Consider your other responsibilities:
Do you have young kids?
Other family members who need care?
A job with no flexibility?
Be honest about your capacity. There’s no shame in saying traditional hospitalization is the better fit for your situation.
How to Access Hospital-at-Home Programs
Most doctors won’t automatically offer this option. You have to ask for it.
When your doctor says you need to be admitted, ask: “Am I eligible for a hospital-at-home program?” If they say they don’t know or haven’t heard of it, ask them to check. Many physicians are still learning about these programs.
Call your insurance company before admission if possible. Verify coverage and get any necessary pre-authorizations. Some programs accept patients directly from the emergency department, which can save you hours in the ER waiting room.
To find hospitals offering hospital-at-home in your area, check the Medicare website’s Hospital Compare tool or call hospitals directly and ask if they participate in hospital-at-home programs.
Questions to Ask Before You Decide
Before you commit to hospital-at-home, get clear answers to these questions.
For your medical team:
“Am I medically stable enough for hospital-at-home?”
“What happens if my condition gets worse at night or on weekends?”
“How quickly can I be transferred to the hospital if needed?”
For the program coordinator:
“How many times per day will someone visit me?”
“Will I see the same nurses and doctors, or will it change?”
“What equipment will be in my home, and who maintains it?”
For your insurance:
“What will my total out-of-pocket cost be?”
“How many days of hospital-at-home care are covered?”
“Is there a limit to how many times I can use this benefit?”
For your family:
“What will I be responsible for as a caregiver?”
“What training will I receive?”
“Who can I call when I’m overwhelmed or unsure?”
Get these answers before you decide. Understanding what you’re signing up for prevents surprises and helps you plan.
Making the Right Choice for Your Family
Hospital-at-home delivers the same quality of clinical care as traditional hospitalization—sometimes better.
But the right choice depends on your medical situation, your home environment, your insurance coverage, and your family’s capacity to help with care.
If George had the option for hospital-at-home care during his treatment, would it have changed the outcome? Probably not. His conditions were too complex and unstable.
But it would have changed our experience. Fewer nights in uncomfortable hospital chairs. More time in our own home. Better sleep for both of us. For the right patient and the right family, those differences matter tremendously.
Know that you have options. Ask questions and advocate for yourself. Don’t assume the hospital is the only place to receive acute care, because it’s not.
If you’re facing hospitalization decisions for yourself or a loved one, share this information with your family. Ask your doctor about hospital-at-home before admission. You might be surprised by what’s possible.
Cryer, L., Shannon, S. B., Van Amsterdam, M., & Leff, B. (2023). Costs for Hospital at Home Patients Were 19 Percent Lower, With Equal or Better Outcomes Compared to Similar Inpatients. Health Affairs, 42(6), 861-868. Retrieved from https://pubmed.ncbi.nlm.nih.gov/22665835/
Edgar, K., Iliffe, S., Doll, H. A., Clarke, M.J., Gonçalves-Bradley, D.C., Wong E., & Shepperd, S. (2024). Admission avoidance hospital at home. Cochrane Database of Systematic Reviews. Mar 5;3(3):CD007491. doi: 10.1002/14651858.CD007491.pub3. Retrieved from https://pubmed.ncbi.nlm.nih.gov/38438116/
Federman, A. D., Soones, T., DeCherrie, L. V., Leff, B., & Siu, A. L. (2018). Association of a Bundled Hospital-at-Home and 30-Day Postacute Transitional Care Program With Clinical Outcomes and Patient Experiences. JAMA Internal Medicine. Aug 1;178(8):1033-1040. doi: 10.1001/jamainternmed.2018.2562. Retrieved from https://pubmed.ncbi.nlm.nih.gov/29946693/
HAI and Antimicrobial Use Prevalence Surveys. (2024). Centers for Disease Control. Retrieved from https://www.cdc.gov/healthcare-associated-infections/php/haic-eip/antibiotic-use.html
Horwitz, L. I., Moriarty, J. P., Chen, C., et al. (2020). Quality of discharge practices and patient understanding at an academic medical center. JAMA Internal Medicine, 180(8), 1125-1131. Retrieved from https://pubmed.ncbi.nlm.nih.gov/23958851/
Levine, D. M., Ouchi, K., Blanchfield, B., et al. (2023). Hospital-Level Care at Home for Acutely Ill Adults: A Randomized Controlled Trial. Annals of Internal Medicine, 176(11), 1455-1466. Retrieved from https://pubmed.ncbi.nlm.nih.gov/31842232/
The House spending bill dropped a bombshell for digital health companies: a proposed 5-year extension for hospital-at-home waivers and 2-year extension for Medicare telehealth flexibilities.
Five years sounds like forever in tech time. But it’s actually a strategic planning nightmare.
Do you build for temporary policy, or bet everything on permanence?
I spent 2 years managing care for my terminally ill husband across 10 different doctors. Every month, he landed back in the hospital with high A1C, low hemoglobin, unbearable pain. If hospital-at-home programs had existed in 2016 with the right technology backing them, he could have avoided dozens of ER visits.
Hospital at home is the future. The question is, what should Series A, B and C health tech founders build in the next 24 months that creates value regardless of what Congress does in 2030?
This isn’t about policy speculation. It’s about strategic planning with incomplete information—which is exactly what building a health tech company requires.
What the Proposed Funding Package Actually Changes
Source: Modern Healthcare
The proposed House spending bill extends two critical Medicare programs—but on very different timelines. Understanding these differences matters if you’re building technology in this space.
The 5-year hospital-at-home timeline explained
The proposed legislation would extend the hospital-at-home waiver through 2030. This isn’t just another short-term patch. Previous extensions gave health systems and tech companies 12-18 months of runway at best.
The current acute hospital care at home initiative lets Medicare pay for hospital-level services delivered in patients’ homes. Without the extension, this program expires in 2025. That’s not enough time to build, validate, and scale meaningful technology infrastructure.
Five years gives you real planning horizon. You can make legitimate platform investments. You can hire engineering teams. You can sign multi-year contracts with health systems.
But—and this is critical—5 years isn’t permanent. It’s a policy experiment with a longer fuse.
What’s still uncertain despite the extension
Even with a 5-year extension, huge questions remain unanswered. CMS hasn’t committed to specific reimbursement rates beyond the waiver period. Will hospital-at-home payments match facility-based acute care, or will they drop to home health rates?
State regulations vary wildly. Some states embrace home-based acute care. Others have licensing requirements that make it nearly impossible. Federal waivers don’t override state-level barriers.
Commercial payers watch Medicare but don’t automatically follow. Your hospital-at-home technology needs Medicare coverage to scale, but commercial adoption determines whether you build a sustainable business.
Technology requirements could shift too. CMS might mandate specific monitoring capabilities, interoperability standards, or quality reporting metrics that don’t exist yet.
Planning for 5 years means planning for uncertainty, not betting on stability.
Most Founders Are Asking the Wrong Question
When the House bill news broke, founder group chats exploded with one question: “Does this mean hospital-at-home is permanent?” That’s the wrong question. It reveals a misunderstanding of how health tech businesses actually succeed or fail.
“Is this permanent?” misses the strategic point
Policy permanence has never guaranteed health tech success. Remote patient monitoring has had Medicare coverage since 2019. Chronic care management codes have existed for years. Both have clear reimbursement pathways. Both have policy stability.
Yet most RPM companies struggle to achieve profitability. Many CCM platforms shut down despite favorable policy.
The real risk isn’t policy reversal. It’s building something nobody needs or can’t afford to operate. Investors price in regulatory risk and execution challenges unique to healthcare.
Your business model needs to create value across multiple scenarios. If hospital-at-home waivers expire in 2030, can your technology pivot to post-acute care? Skilled nursing facilities? Palliative care at home? If you’ve built exclusively for one reimbursement code, you’ve built a fragile company.
The trap of building exclusively for waivers
Remember the telehealth boom of 2020-2021? Some telehealth companies that scaled to thousands of employees during COVID laid off half their staff by 2023.
They weren’t bad companies. They built for a policy moment, not a durable market need.
VCs learned an expensive lesson: waiver-dependent revenue is risky revenue. When I talk to Series B investors now, they ask pointed questions. What percentage of your revenue requires temporary policy? If that policy changes, what’s your Plan B? Can you operate profitably under traditional Medicare rates?
If you can’t answer those questions convincingly, your valuation suffers—even if current policy looks favorable.
What “5 years” really means for your product roadmap
Five years is approximately two technology development cycles for complex healthcare platforms. You can ship an MVP, gather real-world evidence, iterate based on feedback, and launch a mature v2.0 product in that timeframe.
But 5 years isn’t enough time to build everything. You need to prioritize ruthlessly.
Your 24-month window is critical. This is when you validate product-market fit, prove unit economics, and establish your competitive moat. If you can’t demonstrate margin-positive cohorts by month 24, the next 3 years won’t save you.
Years 3 to 5 should assume policy uncertainty, not stability. Build optionality into your architecture. Make sure your platform can serve multiple care settings. Design your data infrastructure to support different payment models.
One scenario planning exercise: map out what your business looks like if hospital-at-home waivers expire in 2030 versus extend another 5 years vs. become permanent. If all three scenarios require fundamentally different strategies, you’re not building a durable company. You’re building a policy bet.
Your 24-Month Minimum Viable Stack
The next 2 years determine everything. You need to build technology that proves value quickly while laying foundation for longer-term expansion. Here’s where to focus your engineering resources and capital.
Core infrastructure that works across reimbursement models
Start with the basics that every home-based care model needs, regardless of how Medicare pays for it.
Remote patient monitoring devices need to integrate seamlessly with your platform. But don’t overbuild here. Start with FDA-cleared devices for vital signs (blood pressure, pulse ox, weight, glucose). Specialty monitoring for rare conditions can wait until you’ve proven your core model works.
Virtual triage and clinical communication platforms matter more than most founders realize. When a patient’s oxygen saturation drops at 3 a.m., someone needs to decide: send an ambulance, dispatch a nurse, or coach the patient through the moment remotely? That decision-making capability is what health systems pay for, not just the device data.
Care orchestration is the unsexy backbone nobody wants to build but everyone needs. Who schedules the nurse visit? Who orders medical supplies? Who coordinates with the patient’s primary care doctor? These back-office functions represent over half of the $1 trillion in annual U.S. healthcare waste. Automating them creates immediate ROI.
EHR integration isn’t optional. Payers demand it. Health systems require it. Your platform needs to pull patient data from Epic, Cerner, and other major EHRs, then push back visit notes, monitoring data, and care plans. Budget 20 to 30% of your engineering resources just for integration work.
Where to invest in AI right now
Source: Health Care Code
Ambient clinical intelligence (ACI) has reached near-universal adoption: 92% of health systems are piloting or deploying AI scribes. These tools improve documentation accuracy, leading to 10 to 15% revenue capture improvement through better coding and billing.
For hospital-at-home programs, this matters enormously. Nurses and paramedics doing home visits often struggle with documentation. They’re managing complex patients in unpredictable environments. AI that turns their verbal notes into structured clinical documentation saves 30 to 45 minutes per visit.
Predictive analytics should focus on preventing acute episodes that require hospitalization. Machine learning models can analyze vital sign trends, medication adherence patterns, and social determinants data to flag patients at risk of decompensation. One health system using predictive monitoring reduced readmissions by 23% in their hospital-at-home cohort—that’s the difference between a margin-positive program and one that loses money on every patient.
Don’t sleep on care coordination automation. If family caregivers spend 15-20 hours per week on caregiving tasks (as CareYaya Health Technologies data shows), your AI should reduce that burden. Automated medication reminders, appointment scheduling, and supply ordering aren’t flashy features, but they’re what caregivers desperately need.
The unsexy AI that saves money: Back-office automation in revenue cycle management, prior authorization, and claims integrity. These AI applications can reach 70-80% profit margins and generate $500K-$1M in annual recurring revenue per full-time employee. That cash flow funds your clinical AI development.
The Margin Math That Actually Matters
Most hospital-at-home programs lose money. Your technology needs to change that equation, or you don’t have a sustainable business.
Why most hospital-at-home programs lose money
Medicare pays $1,000 to $1,500 per day for hospital-at-home. Most programs spend $1,200 to $1,600 per patient daily on nurse visits, supplies, coordination, and tech. They’re underwater from Day 1.
The hidden costs kill you. Logistics and care orchestration require significant labor. Someone schedules visits, manages the supply chain, and coordinates with the patient’s other providers. Traditional staffing models don’t scale—you can’t apply facility-based nursing ratios to home care and expect it to work economically.
Technology that creates work instead of reducing it makes the problem worse. I’ve seen hospital-at-home platforms that require nurses to log into five different systems per visit. The documentation burden exceeds what they’d do in a hospital setting.
How AI makes care at home programs profitable
Revenue cycle optimization through better documentation can improve revenue capture by 10-15%. When a nurse describes a patient’s condition verbally and AI generates accurate, complete clinical notes with proper billing codes, you get paid more for the same work.
Source: MDhelpTEK
Reduced readmissions drive CMS quality bonuses. The hospital-at-home model already shows lower readmission rates than traditional acute care—adding predictive monitoring amplifies that advantage. Every readmission you prevent saves $10,000 to $15,000 in costs and protects against CMS penalties.
Labor cost reduction matters most. AI triage can cut nurse workload by 40%+ in pilot programs. Instead of nurses manually reviewing monitoring data for every patient, AI flags only the patients who need clinical attention. A nurse who previously managed 5-6 hospital-at-home patients can now manage 8 to 10.
The “unsexy” AI that CFOs love but VCs overlook: billing, coding, claims integrity. Administrative AI can reduce operational costs by 30-40%. That’s real margin improvement hitting your income statement immediately.
Proving ROI to your board in the next 6 months
Source: ScribeMD
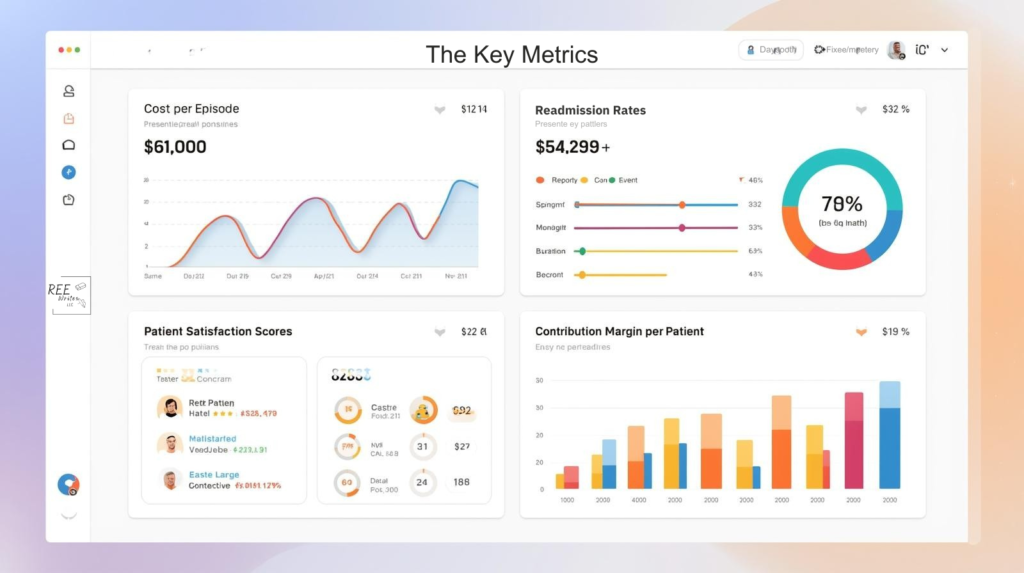
Your board doesn’t care about utilization growth if you’re losing money on every patient. They care about these metrics:
Cost per episode: What does it actually cost you to manage one hospital-at-home patient from admission to discharge? Track this ruthlessly. Break it down by component: labor, supplies, technology, overhead.
Readmission rates: Hospital-at-home programs typically achieve 8 to 12% 30-day readmission rates versus 15 to 18% for traditional hospital care. If your program doesn’t beat facility-based benchmarks, you have a quality problem.
Patient satisfaction: CMS increasingly ties reimbursement to patient experience scores. Hospital-at-home programs score 15-20 points higher on patient satisfaction versus facility care. That’s your competitive advantage.
Structure pilot programs that generate defensible data. Work with 2 to 3 health systems willing to share financial and outcomes data transparently. You need to prove your technology improves margins, not just clinical outcomes.
The difference between utilization metrics and profitability metrics: lots of patients using your platform means nothing if each one loses money. Focus on contribution margin per patient. When does that number go positive? What’s the path to 40 to 50% gross margins?
The 3 to 5 Year Platform Expansion Strategy
Once you’ve proven your core model works and generates positive margins, you can think bigger. The next phase is about expanding beyond your initial use case.
From point solution to platform
Bessemer’s State of Health AI report describes “supernova” companies that achieve 6-10x growth trajectories by expanding from single point solutions into comprehensive platforms. Ambient scribes became full clinical documentation suites. Prior authorization tools became complete utilization management platforms.
The pattern:
Start with a painful, well-defined problem.
Solve it better than anyone else.
Expand into adjacent workflows that touch the same users.
For hospital-at-home technology, that might mean starting with post-surgical patients recovering at home. Prove you can manage that population safely and profitably. Then expand to heart failure management, COPD exacerbations, cellulitis treatment, chemotherapy administration.
Each expansion requires clinical validation and new reimbursement navigation. But your core technology infrastructure of monitoring, triage, care coordination, documentation stays largely the same.
Value-based care integration timeline
Source: Activated Insights
Hospital-at-home is a wedge into value-based care contracts, not just fee-for-service reimbursement. Accountable Care Organizations (ACOs) and Medicare Advantage plans care deeply about reducing avoidable hospitalizations. If your platform keeps patients out of expensive facility-based care, ACOs will pay for it.
But commercial adoption lags Medicare by 18 to 24 months historically. Don’t expect widespread MA plan adoption until 2027 to 2028, even with favorable hospital-at-home policy.
Self-insured employers represent a faster path to commercial revenue. Large employers pay directly for employee healthcare. When they see data showing hospital-at-home reduces costs by 30-40% versus facility admissions, they’ll write checks. Companies like Cubby, who secured $63 million in Series A funding led by Guggenheim Partners, are targeting this employer market specifically for in-home care solutions.
To position for risk-bearing contracts in years 3 to 5, you need data infrastructure now. Start collecting outcomes data, cost data, and patient experience data from day one. Value-based contracts require you to prove your intervention changes total cost of care—not just that patients like your service.
Decision Framework for Health Tech Boards
If you’re a founder presenting hospital-at-home strategy to your board, or a board member evaluating your company’s approach, here are the right questions to ask.
5 questions your board should ask right now
What percentage of our revenue depends on waiver-specific reimbursement? If it’s above 50%, you have concentration risk. Diversify your payer mix and care settings.
If the waiver expires in 5 years, what’s our Plan B business model? You should have a concrete answer. Can you pivot to post-acute care? Palliative care? Chronic disease management? If the answer is “we’re screwed without waivers,” you’re not building a durable company.
Are we building technology that creates value in multiple care settings? The best health tech platforms work across hospital-at-home, skilled nursing, home health, and ambulatory settings. Flexibility equals durability.
How quickly can we prove margin-positive unit economics? If you can’t show positive contribution margin by month 24, extending the timeline to month 36 won’t magically fix the problem. You have a business model issue, not a scale issue.
What’s our competitive moat if 10 other startups get this same 5-year runway? Policy tailwinds create competition. What’s your defensible advantage? Clinical outcomes data? Payer relationships? Technology that’s genuinely better, not just first to market?
Investor perspective on policy-dependent businesses
Source: WallStreetMojo
VCs underwrite regulatory risk by discounting valuations and requiring faster paths to profitability. A pure software company might get 7-10 years to reach profitability. A health tech company with policy dependency gets 3-5 years maximum.
Some investors love policy tailwinds. They want to ride the wave while it’s building. Others avoid policy-dependent businesses entirely, no matter how attractive the market opportunity looks.
Position your pitch carefully. Are you policy-enabled (taking advantage of favorable reimbursement to scale faster) or policy-dependent (can’t exist without specific waivers)? The former gets funded at reasonable valuations. The latter struggles.
What I Wish Existed When I Was a Caregiver
Let me bring this back to why any of this matters. The technology decisions health tech founders make over the next 24 months will determine what tools families like mine have access to in 2026 and beyond.
The gap between technology capability and real-world reliability
Source: Aptiva Medical
My husband’s Dexcom continuous glucose monitor worked beautifully—when it synced properly. The app sent alerts to my phone whenever his blood sugar went dangerously high or low. That device probably saved his life multiple times.
But it only worked because the technology was reliable:
The sensor stayed attached.
The Bluetooth connection held.
The app didn’t crash.
I’ve seen hospital-at-home platforms that look impressive in demos but break under real caregiver stress. The dashboard shows beautiful data visualizations—but requires three different logins to access. The monitoring devices pair easily in the clinic—but fail when WiFi is weak in rural areas.
Care coordination platforms often assume 24/7 nurse availability. They don’t account for the reality that small hospital-at-home programs can’t staff round-the-clock coverage.
Build for the worst-case scenario, not the ideal one.
Building for the sandwich generation managing multiple conditions
Source: Graying with Grace
My husband had 10 doctors. Ten! A primary care physician, nephrologist, endocrinologist, oncologist, cardiologist, and five other specialists. Your platform needs the capability to handle that complexity.
Nobody coordinated between them. I was the coordination layer. I maintained a spreadsheet with all his medications—drug names, dosages, prescribing doctors, reasons for taking them, refill schedules. The nurses loved my spreadsheet because their systems couldn’t give them the same view.
Insurance coordination created endless frustration. My employer’s insurance was primary while Medicare was secondary. Every billing department called me multiple times to confirm this. I explained the same thing to the hospital billing office, the lab, the imaging center, the pharmacy.
Your hospital-at-home platform should automate this nightmare. Pull medication lists from multiple prescribers. Flag potential drug interactions. Coordinate insurance claims automatically. Don’t make family caregivers become project managers.
Why I care about this 5-year window
Families like mine in 2026 deserve better than what I had in 2016.
The technology exists now, and the clinical models work. The question is implementation and sustainability.
Health tech founders have a moral obligation beyond shareholder returns. Yes, you need to build a profitable business and generate returns for your investors. But you’re also building tools that will serve people during the most vulnerable moments of their lives.
This isn’t about making a quick buck off temporary Medicare waivers then exiting before they expire. It’s about building something that lasts. Something that works. Something that actually helps families manage impossible complexity.
When you’re making technology decisions over the next 24 months, remember: real people will rely on what you build. Build something worthy of that trust.
The Path Forward
The proposed 5-year extension for hospital-at-home waivers isn’t a guarantee. It’s a window.
What you build in the next 24 months determines whether your company survives beyond 2030—regardless of what happens with federal policy.
The smartest founders build technology that creates value across multiple reimbursement scenarios. Focus on margin-positive unit economics. Solve real problems for real families—the kind of problems I faced as a caregiver managing impossible complexity across disconnected systems.
Start with the unsexy AI that makes programs profitable: revenue cycle management, clinical documentation, coding accuracy. These aren’t sexy pitch deck slides, but they generate cash flow.
Build your minimum viable stack around care orchestration and monitoring that works when human resources are constrained. Health systems can’t hire infinite nurses. Your technology needs to make existing staff dramatically more productive.
Structure pilot programs that generate defensible ROI data within 6 months. You need proof points for your next fundraise and for health system expansion.
Stress-test your business model. If hospital-at-home waivers expire in 2030, what’s Plan B? If you don’t have a good answer, you’re building on quicksand.
Five years is enough time to build something durable if you start with the right foundation. It’s not nearly enough time if you’re building for a policy moment instead of a market need.
The families who need hospital-at-home can’t wait for perfect policy clarity. They need technology that works today and keeps working tomorrow. So build for that reality.
Want to discuss your hospital-at-home technology strategy?Connect with me on LinkedIn or explore more health tech analysis at reewrites.com.
References
Bessemer Venture Partners. (2026). State of Health AI 2026. Retrieved from https://www.bvp.com/atlas/state-of-health-ai-2026
Fox, A. (2026). 2026 House spending bill proposes 2-year telehealth and 5-year hospital-at-home waiver extensions. Healthcare IT News. Retrieved from https://www.healthcareitnews.com/news/2026-house-spending-bill-proposes-2-year-telehealth-and-5-year-hospital-home-waiver-extensions
Gardner, S. & Hooper, K. (2026). Health tech panel to reboot after a long break. Politico Pulse. Retrieved from https://www.politico.com/newsletters/politico-pulse/2026/01/21/health-tech-panel-to-reboot-after-a-long-break-00737790
Gonzales, M. (2026). Proposed Funding Package Would Extend Hospital-at-Home Program, Medicare Telehealth Flexibilities. Home Health Care News. Retrieved from https://homehealthcarenews.com/2026/01/proposed-funding-package-would-extend-hospital-at-home-program-medicare-telehealth-flexibilities/
Stock Titan. (2026). Cubby secures $63 million in Series A funding round led by Growth. Retrieved from https://www.stocktitan.net/news/GS/cubby-secures-63-million-in-series-a-funding-round-led-by-growth-ikgye2ab40md.html
Zanchi, M. G. (2026). AI Journal. The “unsexy” revolution within healthcare AI. Retrieved from https://aijourn.com/the-unsexy-revolution-within-healthcare-ai/
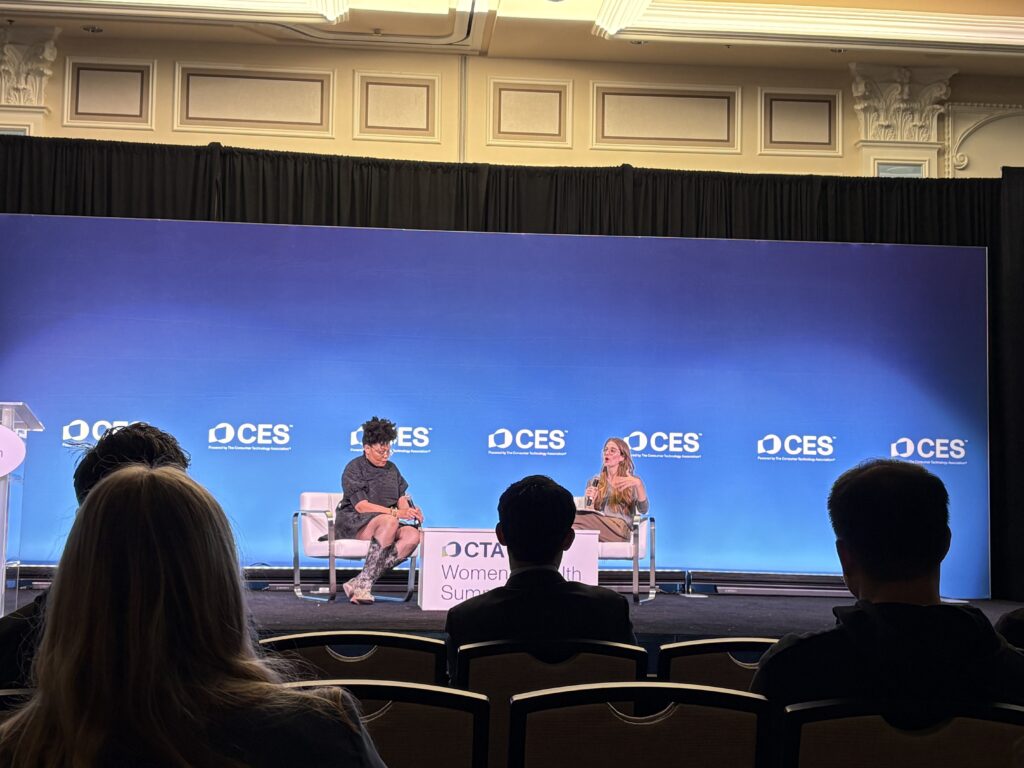
I went to the CES 2026’s Digital Health Summit in my new city of Las Vegas, and yes, I oohed and ahhed at the dancing robots and awesome cars and vehicles on display.
But this isn’t your usual “look at this shiny new device” content you’ll see everywhere else about CES. I’m going to share the hard truths that came directly from patients, caregivers, and the organizations who represent them.
Left to right: Jennifer Goldsack, Randall Rutta, Alice Pomponio, Jake Heller, and Yuge Xiao
Product Design Failures Nobody Talks About
Your product design isn’t neutral
Randy Rutta from The National Health Council shared a couple of stories that should make every product team pause:
A major pharma company launched inhalable insulin with all the confidence in the world. The technology was solid, and the marketing was ready, but it flopped completely because they never asked patients if they’d actually use it.
It turns out that people managing diabetes need precision. Something sprayed into your lungs doesn’t feel precise, even if the science says it is. Plus, patients hated the inhaler design itself. Simple focus groups made of their target user base would have caught both issues before millions were spent on development and launch.
Another story hit even harder for me as a Black woman. Randy said a Black woman refused to wear a health monitoring device because it was a bulky black device on her waistband that made her afraid of being stopped by police. Her solution was painfully simple: “If it came in pink, it would have changed everything for me.”
This isn’t about inclusion for inclusion’s sake. It’s about building products that don’t put users at risk. Product design is literally life-or-death for some users.
Randy also mentioned patients with eczema and psoriasis who can’t wear certain devices because they’re too sensitive to materials touching their skin. That’s a deal-breaker for entire patient populations—a product design consideration that could eliminate your addressable market if you ignore it.
Engage patients early or pay later
Alice Pomponio from American Cancer Society’s venture capital arm sees this pattern constantly. You have to think beyond product features to systemic change. She asks founders: “What is not only the short-term product development strategy, but also the longer-term healthcare systemic step change you’re planning to deliver?”
Get patient voices around your cap table. Diversify your board perspective. Even if you have a great management team with good intentions, without a board that supports patient-centered decisions, you’ll lose the opportunity to make cost-effective strategic choices upfront.
It’s cheaper to fix problems during design than during M&A negotiations when your product strategy determines your acquisition price.
Women’s Health Tech Is Broken
Left to right: Sheena Franklin and Maya Friedman
Women are done waiting for tech that works for THEM
Sheena Franklin of K’ept Health interviewed Maya Friedman from Tidepool about how healthtech uses males as the default for AI.
Maya dropped a statistic that should embarrass the entire diabetes tech industry: 70% of women with type 1 diabetes experience insulin sensitivity changes around their menstrual cycles,but there are NO clinical guidelines or algorithms designed for this. Nothing. So women have to manually adjust their diabetes management systems every single month because the technology assumes their bodies work like men’s bodies.
“We need to stop thinking about women’s health as reproductive health. 𝘌𝘷𝘦𝘳𝘺 𝘴𝘪𝘯𝘨𝘭𝘦 𝘩𝘦𝘢𝘭𝘵𝘩𝘤𝘢𝘳𝘦 𝘤𝘰𝘮𝘱𝘢𝘯𝘺 𝘯𝘦𝘦𝘥𝘴 𝘪𝘯𝘧𝘳𝘢𝘴𝘵𝘳𝘶𝘤𝘵𝘶𝘳𝘦 𝘧𝘰𝘳 𝘥𝘢𝘵𝘢 𝘤𝘰𝘭𝘭𝘦𝘤𝘵𝘪𝘰𝘯 𝘢𝘵 𝘵𝘩𝘦 𝘪𝘯𝘵𝘦𝘳𝘴𝘦𝘤𝘵𝘪𝘰𝘯 𝘰𝘧 𝘸𝘰𝘮𝘦𝘯’𝘴 𝘩𝘦𝘢𝘭𝘵𝘩.”
The data gap is massive
Maya Friedman
Maya referenced a project called “The Library of Missing Data Sets,” an art exhibition of hundreds of empty filing cabinets labeled with data sets that don’t exist across different industries. When you look at what’s missing, you see where biases already exist in healthcare.
As AI becomes more prevalent, these data gaps will replicate the same biases we’re trying to fix. That’s why every healthcare technology company needs infrastructure for data collection at the intersection of women’s health. Not as a “nice to have.” As a business requirement.
Tidepool partnered with Oura to build the largest longitudinal data set of diabetes device data combined with biometric data. They’re distributing Oura rings to thousands of users already on the Tidepool platform. The data will include:
Activity tracking
Sleep patterns
Menstrual cycle data
Diabetes device data from the same individuals
Health surveys for contextual data
This is what infrastructure looks like when you take women’s health seriously.
Algorithms need to be smarter
Maya’s immediate priority: building algorithms that aren’t “cycle agnostic.” She wants systems that account for 30-day hormonal patterns, not just 72-hour learning horizons.
“Women are not just tiny men. We have different needs. We need to display different data. We need algorithms that are potentially different for women versus men.” – Maya Friedman, Tidepool
And yes, that means maintaining multiple versions of products.
Yes, it’s more expensive. But it’s also addressing the actual market need instead of pretending half the population doesn’t exist.
It’s not just about menstrual cycles
Maya’s longer-term vision includes AI models that are dynamic across different reproductive milestones. What does an algorithm look like for someone in perimenopause who isn’t having regular periods? What are the learning horizons for that system?
The real moonshot? A fully closed-loop system that accounts for polycystic ovarian syndrome (PCOS), type 1 diabetes, and menstrual cycles without requiring patient interaction at all.
Women need tech that doesn’t make them choose between their health needs and their time.
Accessibility Creates Market Opportunities, Not Limitations
Left to right: Steve Ewell and Peter Kaldes
Peter Kaldes, CEO of Next50 Foundation, delivered a message that should change how every product designer thinks about their addressable market: “Guess what? You still have a point of view over 50. You still have buying power at 60. You can still use your iPhone at 70, and you need really great technology in the 80s and your 90s.”
Most product designers are under 35. Most assume older adults are technology Luddites. The data proves this assumption is completely wrong.
The buying power is enormous
The over-50 population has more buying power than younger generations. Yet, healthtech companies consistently ignore this market or, worse, design products that stigmatize older users. Peter’s frustration was that was crystal-clear:
“I’ve had conversations with some companies like, where are we going to find [older users to test with]? Well, why don’t you try, first of all, start with your company, and second of all, why don’t you start partnering with community organizations that have access to all these people. This is not hard. It’s just getting people out of their comfort zone.” – Peter Kaldes
Dual generational use is smart design
Peter loves technologies that serve multiple generations. If it’s good for older adults, it’s good for everyone. Examples he highlighted:
Hearing technology embedded in glasses to reduce stigma around hearing aids
AI tools that coordinate healthcare appointments along with transportation and nearby housing options
Financial fraud protection that helps older adults without treating them like children
Left to right: Meg Barron, Dominic King and Myechia Minter-Jordan
AARP CEO Myechia Minter-Jordan shared specific examples of products in AARP’s booth that reduce stigma:
Sneakers designed to prevent falls that look like regular athletic shoes (they appear to have laces, though velcro is involved)
Glasses with closed captions for people with hearing impairments
Glasses with hearing aids built into the stems (partnered with Sadika)
“We want to ensure tools don’t further stigmatize us but allow us to live with dignity and age well.” – Myechia Minter-Jordan
The accessibility-to-mainstream pipeline
Left to right: Natalie Zundel, Griffen Stapp, Ryan Easterly and Jack Walters
Griffen Stapp from Ability Central pointed out something product teams consistently miss: Products designed FOR the disability community often get adopted by everyone. But products made for the general population rarely get adapted later.
Examples are everywhere. Curb cuts help wheelchair users, but they also help parents with strollers, delivery workers with hand trucks, and travelers with rolling luggage. Closed captioning helps deaf users, but also people watching videos in noisy environments or practicing language skills.
Build accessibility in from day one, or you’re leaving both impact and revenue on the table.
Adaptable frameworks beat one-size-fits-all
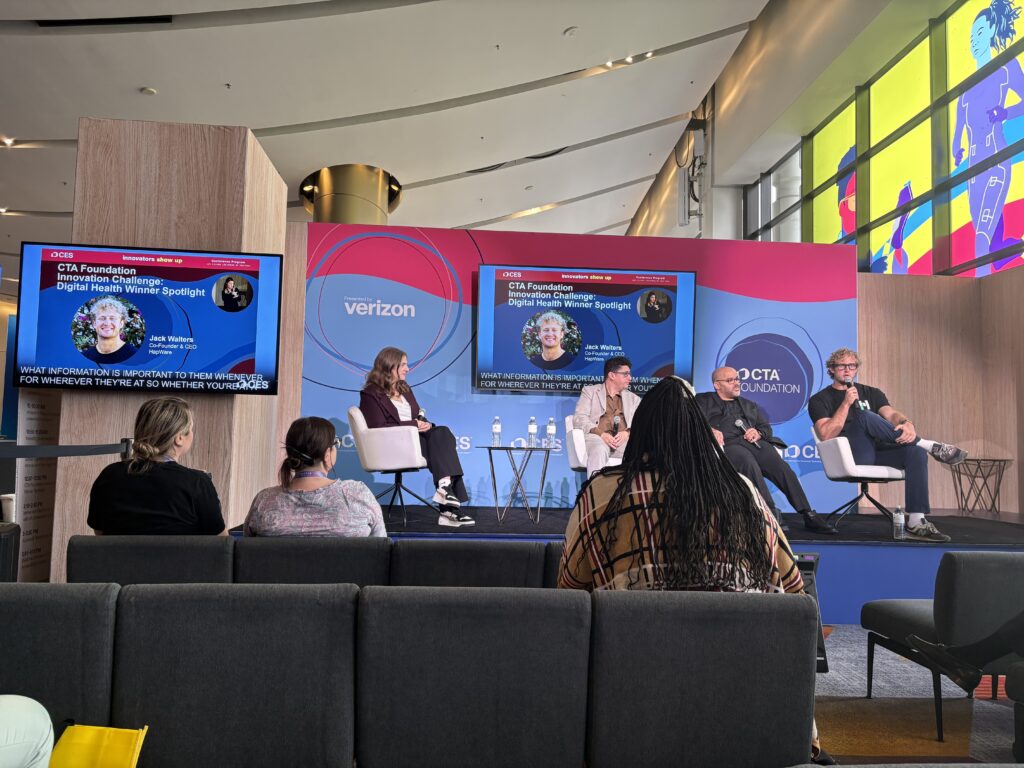
Jack Walters, co-founder of HapWare (winner of the CTA Foundation Innovation Challenge), explained their approach: “Not everyone’s going to have similar care or similar treatments, so you need to be able to adapt to all those different types of needs and necessities in the community.”
They involve the disability community in design from the start, knowing common pain points and anticipating when certain issues might come up. That’s how you build solutions that actually solve problems instead of creating new friction.
Continuous Monitoring Changes Patient Behavior (Without Doctor Visits)
Left to right: Ami Bhatt, Tom Hale, Lucienne Ide and Jack Leach
Tom Hale, CEO of Oura, explained why continuous data matters more than episodic measurements: “Normal isn’t 98.6 degrees. Normal is what’s normal for you, and being able to see that deviation from the baseline allows us to make predictions.”
Oura’s “symptom radar” looks at temperature, heart rate, and other biometrics to predict when you might be getting sick—days before symptoms appear. That’s the intervention window where you can actually change behavior and potentially avoid getting sick entirely.
Patients change behavior when they see their own data
Jake Leach from Dexcom shared a pivotal study from the early days of continuous glucose monitoring. For years, the standard of care for diabetes was finger pricks, which are episodic, painful, and limited.
They ran a study where they put sensors on patients continuously measuring glucose, but they didn’t show patients the data for a week. They just collected baseline information. Then they turned on the display.
Within a day, people started making behavior changes based solely on their own knowledge of their disease and this information they’d never had before. No doctor intervention. No coaching. Just visibility into their own patterns.
The infrastructure problem doctors face
Source:Somebody Digital
Doctors are drowning in data with no infrastructure to process it.
Lucienne Ide from Rimidi left clinical medicine because she was disappointed by how electronic health records (EHRs) were implemented. She expected digital records with clinical decision support layered on top. Instead, she got data dumps with no insights.
As she put it: “I don’t know a single doctor who’s saying, ‘If only I had more data, I would be a better clinician.'”
What doctors need is not more data, but clinical decision support that turns data into actionable insights.
Tom from Oura said one doctor told him: “I want the Oura ring to give me information as if it was written by another doctor. Basically, a consult. Here’s what I know about this patient in clinical terms, and this is the information you need. Everything else, don’t give it to me.”
That’s the responsibility of device companies: Don’t just collect data. Provide insights that save clinicians time and help them make better decisions faster.
Prevention requires behavior change at scale
The consensus was clear: behavior change is what moves the needle on long-term health outcomes. Not medications or procedures. Sleep well, eat well, manage stress, and stay balanced.
Healthcare has failed at behavior change for 75 years because it requires data, user experience (UX), engagement, education, and reinforcement. Doctors don’t have time for that level of ongoing support. Educational content alone doesn’t work because people don’t retain or apply it without reinforcement.
But continuous monitoring combined with AI and smartphone engagement is the combination that finally makes prevention scalable.
As Ami Bhatt from the American College of Cardiology noted, “What has my attention besides my kids? My phone. And I’m looking at that, and that’s the power.”
AI That Actually Helps, Not Hypes
Source:Oxio Health
Dominic King from Microsoft AI cut through all the conference noise:
“The biggest challenge in healthcare today is the mismatch between global demand and constrained supply.” – Dominic King
AI isn’t replacing doctors. It’s closing the gap between what people need and what the healthcare system can deliver.
The future is proactive health companions
5 years ago, AI was good at classification and spotting single problems. Now we have thinking and reasoning models that can pass the same exams physicians take, often at higher rates than human test-takers.
Dominic’s vision for 5 years from now is “A health companion that you wake up and it’s sitting in the background, doing the hard work for you and being more proactive. At the moment, everything is still very reactive.”
This means:
Identifying sleep issues before they compound
Flagging medication adherence problems
Coordinating complex care across multiple providers
Helping people navigate fragmented healthcare systems
Providing specialized opinions even in rural areas
The caregiver opportunity is massive
Myechia shared that one in four Americans are caregivers right now (63 million Americans). If you’re not currently a caregiver or need care yourself, one day you will be.
AI tools can help caregivers:
Communicate with provider teams more effectively
Ensure loved ones are safe at home
Coordinate the “universe of appointments” that comes with aging
Reduce information asymmetry (where only people with medical training understand how systems work)
Dominic emphasized that co-design is critically important. Building WITH users instead of just FOR them avoids the problems we see when products hit the real world.
At Microsoft, they’re seeing 50 to 60 million health questions a day through Copilot. That’s enormous insight into what people actually need help with.
But as he noted, “A lot of founders are young. They don’t have a good idea of what it’s like to be elderly or sick.”
That’s why bringing your end users (patients, clinicians, caregivers) into the development process isn’t optional. It’s the difference between building something that works versus something that sits unused.
The Digital Equity Gap Nobody’s Solving
Left to right: Steve Ewell and Peter Kaldes
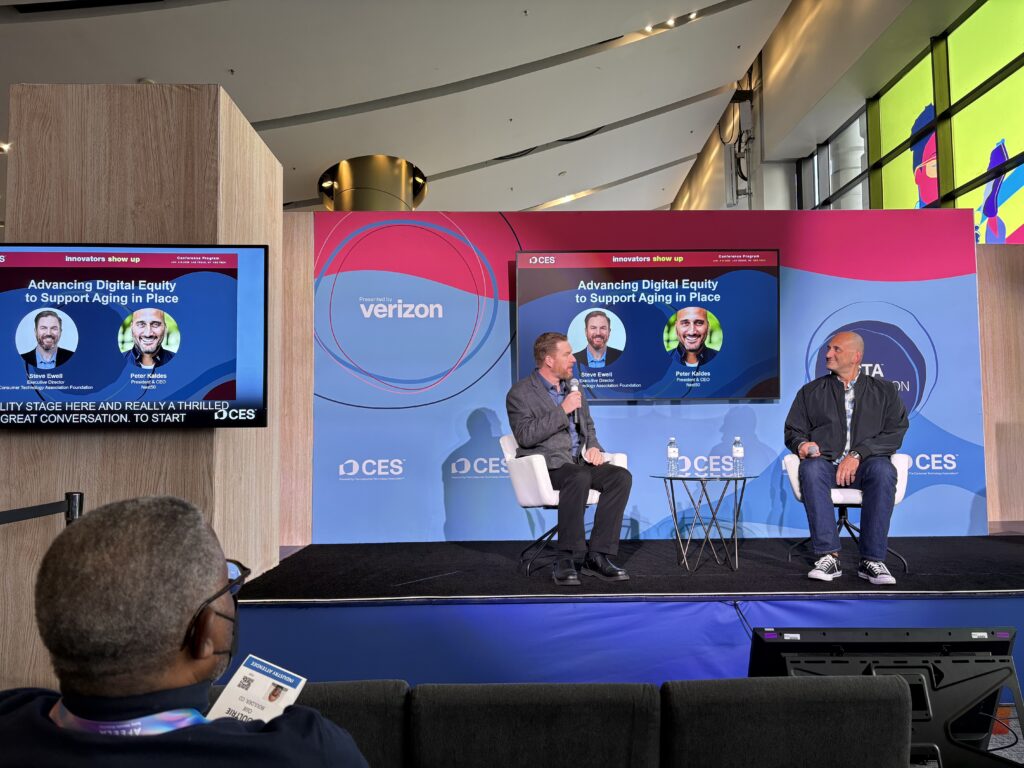
Steve Ewell, Executive Director of CTA Foundation, laid out what he calls “the three legs of the stool” for digital equity:
“You need the hardware, you need the broadband access, and then you need the support and education to go along with it. And so often that last one is left off.” – Steve Ewell
That last leg of support and education is where healthcare technology adoption actually lives or dies.
Tech alone isn’t enough
Peter Kaldes from Next50 Foundation added context that should worry anyone in healthtech: nonprofits doing the heavy lifting of digital equity training are facing unprecedented cuts to federal grants.
As Peter noted: “I love going to an Apple Store and seeing these free classes, but you have to find an Apple Store which are not in the neighborhoods that need the help the most.”
The communities that need technology training the most are the least likely to have access to it. And the organizations that bridge that gap are losing funding.
The clinical trial proof
Source: Anatomy.app
Dexcom is running large clinical trials where half the participants come from underserved communities specifically to prove the technology works equally well regardless of service level. They want hard data showing these tools aren’t just for people with resources.
Rimidi partnered with community health centers during COVID to monitor high-risk pregnancies remotely using blood pressure monitors and texting protocols. They tracked engagement by ethnicity and primary language.
There was no difference in engagement. Everyone has a smartphone in that demographic (women of childbearing age), and everyone can text.
This proves that engagement isn’t the problem. The problem is getting access to the infrastructure and training on how to use it.
Mission-aligned capital as the solution
Source: Next50 Foundation
Next50 Foundation is one of the first private foundations to invest 100% of their endowment in aging-focused companies and infrastructure. Not just grant-making, but the other 95% of their capital.
They created an aging investment framework with JP Morgan that looks at four themes:
Health
Social connectivity (including technology)
Economic opportunity (workforce and financial vehicles for longer lives)
Built environment (mobility, housing, accessibility)
As of December, about 75% of their endowment was invested in this framework, and Peter offered a challenge to the investment community:
“What if capital actually had values? Climate investors have successfully made money and helped power cleaner energy. The same can be true for aging. How can we possibly ignore that the globe is aging?” – Peter Kaldes
They also launched a new nonprofit called Leverage focused on advancing policies in Colorado to make aging more affordable—housing, living wages, caregiving resources.
Because you can’t solve systemic problems with technology alone. You need policy change too.
Patient Voices Need to Drive Startup Decisions
Jake Heller from Citizen Health is building AI tools that help patients with rare diseases query their own medical records and advocate for themselves at doctor’s appointments.
His philosophy: “Putting patients in the driver’s seat is one of the biggest opportunities we have right now.”
The journaling and documentation problem
Sometimes when people with rare or complex diseases go to appointments and talk about their concerns, doctors don’t believe them. These patients need help translating their own experience in a way that clinicians will take seriously.
Citizen Health helps patients journal their symptoms and experiences, then presents that data in clinical terms. “Here’s a video of my daughter having this specific type of seizure. Here are the journal entries. Here’s how this has changed over time.”
That’s advocacy powered by data and AI.
The time-to-diagnosis crisis
Randy pointed out that if you have an autoimmune disease, it could be 3, 5, or even 7 years before diagnosis. For healthcare innovation, it can take 7 years just to move something through an FDA process.
Those time frames compound into suffering that’s completely preventable if we had better systems and patient input earlier in development cycles.
Patient organizations are ready to help. They’re trusted by their communities. They can broker relationships, speed recruitment, help startups get from lab to market faster with products that patients will actually use and that payers will actually reimburse.
The startup trap to avoid
Source: National Institute for Health and Care Research (NIHR)
Alice warned about companies that design products, then go looking for users to validate decisions they already made.
That’s backwards. Instead you should:
Find patient voices early.
Put them on advisory boards.
Include them in design sprints.
Listen to their feedback even when it’s uncomfortable or expensive to implement.
The successful companies in her portfolio think about long-term systemic change, not just short-term product development metrics.
What Healthtech Companies Need to Do Differently
The patient community isn’t a barrier to innovation. They’re the key to building products that actually work.
Stop designing in the dark
Source: Patient Better
If you’re building healthtech without continuous patient input, you’re wasting resources. You’ll miss market opportunities. You’ll build products that don’t get used or that put certain populations at risk.
Randy’s message was clear: “Come to us, and we will broker that relationship, because in the end, you’ll be more successful, and the patient community will get a better result.”
Measure what matters
Myechia challenged the AI industry on how they measure success: Don’t count the number of tools or features. Measure whether you’re closing the gap between lifespan and health span.
That gap is currently 13 years, which is the difference between how long people live and how many of those years are healthy years. If your technology doesn’t move that number, what’s the point?
Think systemically, not just tactically
Source: IQ Eye
Every speaker emphasized that technology is only one piece of a larger puzzle. You also need:
Policy changes that support adoption
Payment models that reward prevention
Training infrastructure for underserved communities
Clinical decision support that turns data into insights
Algorithms that account for biological differences across populations
If you’re only focused on your device or platform, you’re missing the bigger picture of how healthcare actually works.
The sales enablement angle
All of these insights about patient needs, accessibility requirements, women’s health gaps, digital equity challenges are the stories your prospects need to hear during long sales cycles.
B2B healthtech sales aren’t quick. You’re selling to health systems, payers, and large provider networks. The buying committees are complex. The evaluation periods stretch for months.
That’s exactly when prospects go cold or arrive at sales calls unprepared.
I create educational email courses to bridge that gap. They keep prospects engaged with the exact kind of patient-centered insights I heard at CES. They position your company as one that understands real-world healthcare challenges, not just technology features.
In 2026 and beyond, healthtech companies that want to win understand their users deeply enough to build products those users will actually want, trust, and use.
The Measurement Challenge
How do you know if you’re succeeding at patient-centered design? Myechia offered a simple test: “What do you want your life to look like at 75?”
You probably want to:
Stay in your home
Feel healthy
Stay empowered
Have information flow easily between you and loved ones
Remain connected to family and physicians
Be safe at home
Engage in daily activities with ease and without pain
Understand your medical information and chronic diseases
Control who has access to your data
Have a care plan you can execute yourself
Receive information you trust and can use readily
If your tech helps people achieve any of those goals, you’re on the right track. If it doesn’t, you need to rethink your approach.
Final Thoughts
CES 2026’s Digital Health Summit covered the hard work of actually listening to patients, caregivers, and the communities being served.
Startups who want to be successful in healthtech aren’t the ones chasing the next funding round or the flashiest AI feature. They’re the ones asking better questions:
Have we talked to patients who look different from our team?
Does our product work for women’s bodies, not just male bodies?
Can older adults use this without feeling stigmatized?
What infrastructure needs to exist beyond our technology?
Are we solving a real problem or just building something technically impressive?
Those questions lead to products that get adopted, outcomes that improve, and companies that actually make a difference. That’s the kind of healthtech worth building.
Every month, someone’s decision to donate blood gave him a little more time, and I’m grateful for that. But blood donation is NOT for everyone.
My late mother learned this the hard way. She faithfully donated with the American Red Cross every 56 days like clockwork, believing she was doing good. And she was, until her then-undiagnosed congestive heart failure (CHF) made each donation increasingly dangerous. The blood loss depleted her already-compromised system, leaving her exhausted for weeks.
Her doctors eventually told her to stop.
January is National Blood Donor Month
One pint of blood can save up to three lives. The American Red Cross says someone in the U.S. needs blood every 2 seconds, but only 3% of eligible Americans (those without contraindications) donate annually.
Source: Stanford Blood Center
Who should NOT donate blood
The FDA and American Red Cross give several contraindications, meaning that if any of the following apply, you should not donate:
Active heart disease or severe cardiovascular conditions
Uncontrolled high blood pressure (over 180/100)
Recent heart attack or stroke
Severe anemia (hemoglobin below 12.5 g/dL for women, 13.0 g/dL for men)
Active cancer or recent cancer treatment
Bleeding disorders or current anticoagulant therapy
Chronic kidney disease
Certain autoimmune conditions during flare-ups
Do you know your blood type?
Only 43% of Americans do, but knowing your blood type can be lifesaving:
In emergencies: Medical teams can administer compatible blood immediately without waiting for typing tests, which can take 45-60 minutes.
For rare blood types: If you’re O-negative (universal donor) or AB-positive (universal plasma donor), you’re critically needed. O-negative makes up only 7% of the population but can be given to anyone.
During pregnancy: Blood type incompatibility between mother and baby can cause serious complications. Knowing your type allows early intervention.
For chronic conditions: People with sickle cell disease, thalassemia, or other conditions requiring frequent transfusions need closely matched blood to prevent complications
If you need surgery: Matching blood in advance reduces transfusion reaction risks and speeds emergency response
According to the National Institutes of Health (NIH), patients who receive a transfusion from an incompatible blood type can experience severe reactions, including kidney failure and death.
The Stanford Blood Center reports that having blood typed and screened in advance can reduce emergency transfusion time by up to 30 minutes, which is critical in traumatic or crisis situations.
If you have cardiovascular issues or other contraindications, prioritize your own health. Other ways to help are by volunteering at blood drives, spreading awareness, and donating money to blood banks.
Regardless of whether you can donate, know your blood type, and the blood type of anyone you care for. It could save your life or help save someone else’s.
organize medical information (including blood type)
coordinate between providers
advocate effectively
References
American Red Cross. (n.d.). Requirements by Donation Type. Retrieved from https://www.redcrossblood.org/donate-blood/how-to-donate/eligibility-requirements.html
U.S. Food and Drug Administration. (2023). Compliance Policy Regarding Blood and Blood Component Donation Suitability, Donor Eligibility and Source Plasma Quarantine Hold Requirements. Retrieved from https://www.fda.gov/regulatory-information/search-fda-guidance-documents/compliance-policy-regarding-blood-and-blood-component-donation-suitability-donor-eligibility-and
National Heart, Lung, and Blood Institute. (2025). Donate Blood. Save Lives. Retrieved from https://www.nhlbi.nih.gov/education/blood/donation
Stanford Blood Center. (2024). Blood Type Compatibility. Retrieved from https://stanfordbloodcenter.org/donate-blood/blood-donation-facts/blood-types/
Your healthtech startup just nailed the product demo. The prospect loved your solution. They asked great questions. Everyone smiled and nodded. And then… silence.
Your prospect isn’t saying no, but they’re not saying yes either. They’ve gone dark. And while you wait, your pipeline stalls, your forecast becomes fiction, and your investors start asking uncomfortable questions.
If that’s typical for your startup, then you’re stuck in what sales leaders call the “dead zone.” It’s that frustrating gap between an enthusiastic demo and an actual decision.
This isn’t a follow-up problem; it’s a deal architecture problem. Let’s see why it happens, and how to fix it.
The dead zone doesn’t happen by accident. It’s built into how healthcare organizations buy technology. Understanding these forces helps you design a process that works with them, not against them.
Your champion can’t move forward alone, even if they love your product. Here’s who typically needs to sign off:
Clinical staff validate workflow impact and patient safety concerns
IT teams assess technical integration and infrastructure requirements
Compliance officers review HIPAA and regulatory implications
Finance departments demand ROI justification and budget alignment
C-suite executives evaluate strategic fit and organizational priorities
Decision-making authority is unclear or distributed across multiple departments, which means your single point of contact has less power than you think.
Procurement cycles that stretch for months
Source: CorporateVision
Healthcare organizations operate on budget cycles that don’t match your timeline. As it stands, large purchase approvals require alignment from at least 5 key stakeholders, and 86% of B2B purchases stall during the buying process. The typical B2B buying cycle spans 11.5 months.
The challenges you’ll face during this timeline:
The average healthtech sales cycle runs 9-18 months
Most delays occur post-demo rather than pre-demo
Budget freezes and reallocation priorities create unexpected stops
Capital requests often have to wait until the next quarterly meeting or annual board meeting
Even if you’re ready to close, your prospect won’t see their available budget until Q3.
Risk aversion in healthcare organizations
Healthcare buyers face career risk when new technology fails. HIPAA compliance, patient safety, and data security create legitimate concerns that go beyond typical B2B software fears.
Case studies from similar healthcare organizations
Reference calls with peers in comparable settings
Security audits and compliance documentation
Implementation plans that minimize disruption
The status quo feels safer than change, even when change would help.
Why Your Champion Goes Silent After the Demo
You didn’t lose the deal because of your product. You lost it because your champion hit an internal wall they couldn’t climb alone.
They lack internal buy-in from key stakeholders
Maybe your champion didn’t build a consensus before bringing you in. They saw your solution, got excited, and scheduled a demo without socializing the idea internally first. Other departments see the demo as “their project,” not a company priority.
This happens when:
Clinical staff, IT teams, or compliance officers weren’t in the room during your presentation
Your champion is now selling internally without your help or materials
They’re trying to recreate your demo in conference rooms and Slack channels
They’re failing because they don’t have your expertise or your sales enablement resources
It could be that your champion is fighting battles you don’t even know about.
They can’t build a business case
Rejected healthtech proposals fail due to “insufficient financial justification” rather than product concerns. So it’s also possible your ROI explanation doesn’t translate into their internal budget language.
Your champion needs specific numbers, like:
Cost savings expressed in their organization’s actual spend
Efficiency gains measured by hours saved or capacity increased
Revenue impact tied to reimbursement or patient volume
Risk reduction quantified in dollars, not just qualitative benefits
Your champion doesn’t know how to quantify the problem you solve in the terms their CFO cares about.
Most healthcare leaders consider ROI as the primary factor in their purchasing decisions. Finance teams shoot down proposals that lack concrete financial justification, and generic industry benchmarks won’t cut it.
They’re overwhelmed by next steps
If you didn’t create a mutual action plan after the demo, then your champion doesn’t know what to do next, or who needs to do it. Their path from demo to contract feels unclear and complicated.
The questions swirling in their head:
Do they need security documentation first?
Should they schedule an IT review?
Who builds the business case?
What approvals are required and in what order?
Then, other priorities compete for their attention, and your deal slides down the list.
Mistakes That Send Deals to the Dead Zone
Most healthtech sales teams create their own dead zone problems. See if any of these mistakes seem familiar.
Not mapping the decision process before the demo
Most salespeople demo before understanding the approval process. You don’t know who makes the final call or controls the budget. Critical stakeholders aren’t identified until after you’ve presented, which means you built your pitch for the wrong audience.
Treating demos as closing events instead of middle steps
This is when the demo becomes your peak moment instead of a milestone. You celebrate interest without securing commitment to next actions.
Your prospect leaves with information but no obligations. There’s no scheduled follow-up, no agreed-upon timeline, no documented next steps.
Four things you’re missing are:
Commitment to specific next actions with dates
Agreement on who needs to be involved going forward
Documentation of the decision process and timeline
Accountability for both your tasks and theirs
You haven’t earned the right to ask for specific commitments yet, so you don’t. Then you wonder why they ghosted you.
Failing to create urgency around the problem
When your demo focuses on features instead of the cost of inaction, prospects feel no sense of urgency.
Prospects don’t feel pressure to change their current situation because you haven’t quantified what staying with the status quo costs them in dollars, patient outcomes, staff burnout, or a competitive disadvantage.
There’s no compelling event driving a decision timeline. When everything is important, nothing is urgent.
How to Keep Deals Moving Through the Decision Phase
You can’t eliminate the dead zone entirely, but you can shrink it. Here’s your playbook.
Build a mutual action plan before you demo
Document every step from demo to signature with specific dates. Then get your prospect to commit to milestones in writing, even if it’s just a shared Google Doc.
Your mutual action plan should include:
Specific dates for each milestone, not vague timeframes
Names who will own every action item on both sides
Dependencies that could block progress
Decision criteria that need to be met at each stage
Map the buying committee during discovery, not after the demo. Ask questions like “Who else needs to be involved in this decision?” and “What does your typical approval process look like?”
To engage stakeholders effectively, you should:
Identify everyone who has input or veto power.
Understand their concerns and what success looks like for each person.
Schedule separate sessions for different stakeholder groups.
Tailor your messaging to what each group cares about.
Create sales enablement materials your champion can share internally.
Make the business case impossible to ignore
Translate your value into their specific metrics and KPIs. Build ROI models with their actual data, not generic industry averages. If they’re losing $200K annually to manual workflows, show them that number with their own figures.
Your business case should include:
Current state costs using their actual numbers
Future state benefits tied to their strategic goals
The cost of delay expressed in quarterly or monthly terms
The payback period and total ROI over 3-5 years
Risk mitigation value they can’t get from their current approach
Show the cost of delay in concrete terms they can present to leadership: “Every quarter you wait costs $50K in lost efficiency.” That’ll get their attention!
Schedule the next meeting before you leave the current one
Never end a conversation without making the next appointment.
Don’t say “I’ll follow up next week.” Say “Let’s get 30 minutes on the calendar for Thursday at 2 pm to review the security documentation with your IT director.”
To make every next step count:
Be specific about the date, time, and attendees
State the purpose and agenda for the meeting
Include the right stakeholders from the start
Confirm attendance from all required participants
Send the invite before you end the call or leave the room
Use calendar invites to maintain theircommitment.
The Five Warning Signs Your Deal Is Entering the Dead Zone
If you catch these signals early, you can still save the deal.
Your champion stops responding within 48 hours
Response times stretch from hours to days to weeks. Messages shift from specific (“Can you send the HIPAA compliance documentation?”) to vague (“Let me check with my team”). Your champion cancels meetings or suggests “checking back later” without offering alternative dates.
You’re chasing instead of collaborating.
New stakeholders appear who weren’t in your process
Someone from IT, legal, or procurement suddenly has questions. These stakeholders don’t have context from earlier conversations, so they’re starting from zero.
Watch for these red flags:
They raise objections you thought you’d already addressed
Your champion can’t or won’t facilitate introductions to these people
You’re answering basic questions that should’ve been covered weeks ago
Each new stakeholder brings a completely different set of concerns
This means your champion isn’t in control of the internal process.
The timeline becomes unclear
What this looks like:
Dates you agreed to slip without explanation.
Your prospect stops committing to specific next steps, replacing “We’ll have a decision by March 15” with “We’re still working through some things.”
Budget approval timelines shift or become uncertain.
Urgency disappears from the conversation.
When timelines evaporate, so do deals. Time kills deals.
Requests for information become repetitive or circular
Answering the same questions multiple times for different people is a waste of time and energy. When different stakeholders ask for information you’ve already provided, or your champion isn’t distributing materials internally, it quickly gets chaotic:
Your prospect can’t consolidate feedback from their internal team.
Everyone’s operating on their own without any team coordination.
The goalposts keep moving with new requirements.
No one seems to remember what was already agreed upon.
This signals a breakdown in your champion’s internal process.
Your champion asks you to “be patient” or “give them time”
Generic stall language replaces specific action commitments.
Your champion can’t articulate what’s happening internally or who’s holding up the process. They avoid discussing the actual decision-making process when you ask direct questions. You sense they’re hoping you’ll go away.
This isn’t patience—it’s avoidance.
What to Do When a Deal Goes Dark
Don’t give up—try these interventions first.
Use a breakup email to force a response
Write a professional note acknowledging the silence: “I haven’t heard back after my last three emails. I’m guessing this isn’t a priority right now.”
Give your prospect permission to say no: “If you’ve decided to pause or go another direction, that’s completely fine. Just let me know.”
Your breakup email should:
Acknowledge the silence without being passive-aggressive.
Give permission to say no to make responding easy.
Create urgency by suggesting you’re moving on.
Include a simple yes/no question they can answer quickly.
Reach out to people who were in earlier meetings, and provide value:
Share a relevant case study, industry report, or article that addresses a concern they raised.
Ask if there’s anything blocking progress from their perspective: “I wanted to check in—is there anything on our end that would help move this forward?”
Position yourself as a resource, not a pest.
Offer a smaller commitment to restart momentum
Suggest a pilot program or limited trial that reduces risk. Propose a workshop or assessment instead of a full implementation: “What if we started with a 30-day pilot in one department?”
Ways to reduce the ask:
Pilot programs in a single department or location
Proof of concept projects with limited scope
Assessment or audit services to quantify the problem
Executive workshop to build internal alignment
Build a Sales Process That Prevents the Dead Zone
The best way to handle the dead zone is to not enter it in the first place.
Run a sales audit to find where deals stall
Review your last 20 lost opportunities to identify patterns. Track which stage most deals go dark (Hint: it’s probably post-demo). Calculate your conversion rate from demo to next step, from next step to proposal, and from proposal to close.
Your sales audit should examine:
Conversion rates between each stage of your pipeline
Average time spent in each stage before progression or loss
Common objections that appear in lost deal notes
Stakeholder gaps where key decision-makers weren’t engaged
Process breakdowns where your team didn’t follow best practices
Interview former prospects who ghosted you to understand why. Ask questions like “What happened internally after our demo?” and “What would have made it easier to move forward?”
Document the gaps between your process and their buying process.
Day 2: Average time in each stage to spot bottlenecks
Day 3: Review lost deal notes for patterns
Day 4: Interview your team about common objections and stalls
Day 5: Prioritized list of fixes based on impact and effort
Create a post-demo playbook for your team
Script the conversation that happens at the end of every demo. Your reps should never let a prospect leave without completing three tasks: scheduling the next meeting, documenting the mutual action plan, and identifying any stakeholders who need to be involved.
Your playbook should include:
Scripts for transitioning from demo to next steps
Templates for mutual action plans and business cases
Stakeholder-specific materials for champions to use internally
Objection handling guides for common post-demo concerns
Role-playing exercises to practice the post-demo conversation
Implement a deal review cadence for stuck opportunities
Meet weekly to discuss deals that haven’t progressed in 10+ days. Bring fresh perspectives to stalled conversations—sometimes another team member sees an angle you missed.
Your deal review process should:
Identify stuck deals based on time since last progression
Diagnose the blocker using the warning signs framework
Develop intervention strategies specific to each situation
Assign ownership for executing the intervention
Follow up within 48 hours to measure results
The Dead Zone Doesn’t Have to Win
The dead zone kills more healthtech deals than pricing, competition, or product gaps. You can’t control healthcare buying cycles, but you can control your process”
Start by running a sales audit to find where your deals actually stall.
Map the decision process before you demo, not after.
Build mutual action plans that turn prospects into partners.
Create urgency around the problem, not just excitement about your solution.
Your demo isn’t the finish line; it’s like getting to mile marker 5 in a marathon. The companies that win in healthtech sales know this, and design their process to bridge the gap between demo and decision.
They make it easy for champions to sell internally, and they never let a deal go dark without a fight.
Imagine that one of your potential or current customers is desperately seeking help, and they land on your website. They find your FAQ page, scroll through dozens of entries about your “mission” and “values,” but can’t find the simple answer they need.
They leave and go on to the next website, still searching for answers. You’ve lost them.
The problem isn’t that FAQs don’t work—it’s that most companies build them backwards. They write questions they want to answer instead of questions customers actually ask. This guide shows you how to flip that script. You’ll learn exactly how to find the real questions your users are asking, organize them so people can actually find answers, and create an FAQ section that builds trust instead of frustration.
Most companies treat their FAQ section as a place to dump corporate talking points. They use it to explain policies that benefit the company, not to solve customer problems.
If your FAQ page isn’t helping people, it’s a waste of time.
The disconnect between company priorities and user needs
When you write “What makes our company special?” instead of “How do I return a damaged item?”, you’re wasting everyone’s time. Customers don’t care about your award-winning customer service philosophy when they’re trying to figure out shipping costs.
But when your FAQ is full of vague answers and marketing speak, you force people to contact support anyway. That ineffective FAQ page increases your costs and frustrates your customers.
The cost of poor FAQs
Poor FAQs have real business consequences. They lead to:
Increased support tickets and calls for simple questions you could’ve answered online
Cart abandonment when shoppers can’t find basic information
Lost sales because customers give up and go to competitors
Damaged credibility when your “Help” section doesn’t actually help
Instead, of thinking about what you want to say, start thinking about what your customers need to know.
How to Find The Questions Your Customers Ask
You don’t need to guess what questions to answer. Your customers are already telling you—you just need to listen. Here’s where to find the real questions that matter.
Mine your customer support tickets and email inquiries
Your support inbox is a goldmine. Every ticket represents a question your FAQ should’ve answered but didn’t.
Start by reviewing your last 200 support tickets or inquiries. Look for patterns. You’ll notice the same questions appearing again and again.
Pay attention to the exact words customers use. If 10 people ask “Can I change my order after I place it?” that’s an FAQ question.
Check your live chat transcripts
Live chat shows you what confuses people in real-time. Unlike support tickets, chat transcripts capture the moment of confusion. You can see exactly where customers get stuck in their journey.
Review 50 to 100 recent chat sessions or comments. Which pages do people visit where questions come up? If everyone chatting from your pricing page asks the same question, you need to add that to your FAQ.
Analyze your website search data
Your internal search bar tells you what people can’t find on their own. Log into your website analytics and pull up your site search reports.
The top 20 search terms reveal your biggest content gaps. If “refund policy” appears 500 times a month in your search data, but you’ve buried that information three clicks deep, you’ve found an FAQ question.
People ask questions on social media because they couldn’t find answers on your website. Check your:
Facebook and Instagram comments on your posts
Twitter mentions and DMs
LinkedIn company page comments
YouTube video comments if you have a channel
You’ll find questions you never thought to address. Social media gives you unfiltered feedback about what confuses people or what they wish you’d explain better.
Read your product and service reviews
Reviews aren’t just about ratings—they’re full of questions and confusion. Browse your reviews on your site, Amazon, Google, TrustPilot, Yelp, or industry-specific platforms.
Look for reviews that mention confusion or difficulty. Comments like “I wish I’d known this before buying” or “It would be helpful if they explained…” show you missing FAQ topics.
Your front-line teams hear everything. They know which questions come up daily and which explanations customers struggle to understand.
Schedule monthly FAQ check-ins with these teams. Ask: “What questions did you answer this week that we should add to the FAQ?” They’ll give you specific, actionable insights you can’t get from data alone.
The Best Research Methods to Find User Intent in Searches
Finding questions is step one. You need to understand why people ask them and how they think about their problems.
Set up a tagging system
Create a simple system to categorize every support inquiry. You can use tags like:
Update it weekly. Questions that appear 10+ times are high priority for your FAQ. Questions that appear once might not need to be there at all.
Use keyword research tools
Tools like Google’s “People Also Ask” feature, Answer the Public, and your SEO platform show you what people search for online.
Enter your main topic and see what questions Google suggests. If Google thinks these questions are important enough to show in search results, they should probably be in your FAQ. Research shows “People Also Ask” (PAA) boxes appear in 85% of Google search results, making them a reliable indicator of common questions.
Run card sorting exercises with real users
Source: Interaction Design
Card sorting helps you understand how people naturally group information.
Test with 5 to 10 people from your target audience. Give your research participants 20 to 30 FAQ topics written on cards (physical or digital). Ask them to organize the cards into groups that make sense to them.
This is a great way to learn how they think about your content. Maybe they group all payment questions together, while you had them scattered across “Billing,” “Subscriptions,” and “Refunds.” Use their mental model to design the structure of your FAQs.
Conduct user testing on your current FAQ
Watch real people try to use your existing FAQ. Give them specific tasks like “Find out how to cancel your subscription” and observe where they struggle.
Finding the right questions matters, but your answers need to deliver. Here’s how to write FAQ answers that people can actually use.
Use your customer’s language
Write like your customers talk, not like your legal team talks. If customers say “cancel,” don’t write “terminate your subscription agreement.” If they say “broken,” don’t write “manufacturing defect.”
Don’t make people read three paragraphs to find what they need. Start with the answer, then add details if needed.
Poor: “Our company values customer satisfaction. We’ve designed our return policy with flexibility in mind. After careful consideration of industry standards…”
Way Better: “You can return items within 30 days for a full refund. Keep your receipt and original packaging.”
The second version respects your reader’s time.
Keep answers scannable
Source: Ahrefs
Most people scan—they don’t read word by word. Make scanning easy with:
Short paragraphs (2-3 sentences max)
Bullet points for lists or steps
Bold text for key information
Clear headers that describe what’s in each section
Abstract answers create more confusion. Concrete examples make everything clear.
Instead of: “Shipping times vary based on your location.”
Write: “Shipping takes 2-3 business days within the continental US, 5 to 7 days to Alaska and Hawaii, and 7 to 10 days internationally.”
Numbers, timeframes, and specifics eliminate ambiguity.
Add visuals when they help
Some answers work better with screenshots, diagrams, or short videos. If you’re explaining how to use a feature, a 30-second video beats 300 words of text.
But only add visuals when they actually clarify something. Don’t add images just for decoration. Every element should have a purpose.
Smart Ways To Organize Your FAQ Architecture
Source: ResearchGate
Even perfect answers won’t help if people can’t find them. Your FAQ structure determines whether users get help or give up.
Group by the customer journey stage
Source: Funnelytics
Organize questions around where customers are in their relationship with you.
Before buying:
Pricing and payment options
Product features and specifications
Shipping and delivery
During use:
Getting started guides
Common tasks and how-tos
Tips for better results
When there’s a problem:
Troubleshooting steps
Returns and refunds
Contacting support
This structure matches how people think. A potential customer doesn’t want to wade through troubleshooting questions. (Someone with a broken product doesn’t care about your payment plans.)
Create clear categories with descriptive names
Your category names should be obvious. Don’t get creative here—clear beats clever.
Your FAQ search needs to be smart. But building a fancy search function might not be realistic or necessary.
If you have fewer than 25 FAQ questions, you probably don’t need search at all. A simple, well-organized page with clear categories and a table of contents at the top works fine. Users can scan and find what they need quickly.
If you’re using a website builder like Squarespace, Wix, or WordPress, many come with basic built-in search. Turn it on if you have it, because even simple search is better than none. Most platforms include this feature in their standard plans.
For growing solopreneurs with 50+ FAQs, consider these free options:
Use your platform’s native search and make sure your FAQ titles include the exact words customers use
Add a “jump to section” table of contents at the top of your FAQ page with clickable links (just like this article)
Try Algolia’s free tier (up to 10,000 searches per month) if you need something more powerful
Use Google Custom Search Engine (free with ads, or $5/month without ads)
Don’t stress about having the “perfect” search experience. A well-organized FAQ with clear headings and a ctrl+F-friendly structure beats a poorly organized FAQ with expensive search any day.
Show your most popular questions first
Don’t make everyone scroll to find common questions. Put your top 5 to 10 questions right at the top of your FAQ page where everyone can see them.
Update this list quarterly based on your analytics. The questions people viewed most last month should be prominently displayed.
Technical SEO For Your FAQ Content
Good FAQs help customers. SEO-optimized FAQs help customers find you in the first place.
Source: RankMath
Use FAQ schema markup
Schema markup is code that tells Google “this is a question and answer.” It can make your FAQs appear in search results as rich snippets; those expanded results that show the question and answer right on the Google search page.
Pages with FAQ schema have been shown to get more clicks than regular listings. It’s worth the technical effort or asking your developer to add it.
Structure each question as a heading
Use H2 or H3 (subheading) tags for your questions (the heading above is an H3). This helps screen readers, improves accessibility, and tells search engines these are important questions.
Don’t just bold your questions, use proper heading tags. Search engines pay attention to headings when deciding what your page is about.
Target long-tail keywords
Long-tail keywords are specific phrases people actually search for. “How do I track my order?” is a long-tail keyword. “Tracking” is not.
Write your FAQ questions the way people search. Google Search Console shows you the exact phrases people use to find your site. Use those phrases as your FAQ questions when relevant.
Your FAQ isn’t a one-and-done project. It needs regular care to stay useful.
Review quarterly
Set a reminder to review your FAQ every three months. Check that:
All information is still accurate
Links still work
Product features haven’t changed
Policies are up to date
Nothing destroys trust like outdated information. If your FAQ says “we ship within 24 hours” but you changed that policy six months ago, you’re creating problems instead of solving them.
Source: Powerslides
Add new questions as they emerge
When you get the same question multiple times, add it to your FAQ page ASAP. Keep your FAQ fresh and responsive to current customer needs.
Archive outdated questions
If a question no longer applies, remove it. Don’t leave it there with a note saying “this feature no longer exists.”
Don’t neglect to update your FAQs because old, irrelevant questions make your FAQ harder to navigate. They waste your users’ time sorting through them, and make your business look sloppy.
Track your FAQ metrics
Use analytics to monitor:
Which FAQ questions get the most views
How long people spend on FAQ pages
Whether people contact support after viewing an FAQ
Search terms that lead people to your FAQ
If a question gets 1,000 views a month but your bounce rate is 90%, that answer isn’t working. Test a clearer version and see if engagement improves.
Common FAQ Mistakes To Avoid
Even with good intentions, it’s easy to mess up your FAQ. Watch out for these common problems.
Source: RCR Financial
Writing in corporate voice
Your FAQ should sound like a helpful friend, not a legal document. Compare these examples:
Corporate: “Upon receipt of your inquiry, our customer success team will endeavor to provide resolution within the timeframe specified in our service level agreement.”
Helpful: “We’ll respond to your message within 24 hours on business days.”
The second version is easier to understand and gets to the point.
Give people the core answer fast, then add details for those who need them.
Using your FAQ as a dumping ground
Just because someone asked a question once doesn’t mean it needs to be in your FAQ. Focus on questions that come up repeatedly. A FAQ with 200 questions helps nobody—it’s too overwhelming to use.
Your FAQ page should be one of your hardest-working assets. When built with real user questions and organized around how people actually think, it reduces support costs, builds trust, and helps customers succeed faster.
The key is to stop guessing what people want to know and start listening to what they’re already asking.
Your customers are searching for answers right now. Give them a FAQ page that actually delivers. Your support team will thank you, your customers will trust you more, and your business will benefit from the reduced friction.
The best FAQ pages don’t feel like FAQs at all—they feel like a helpful friend who knows exactly what you need.
The intersection of chronic illness management and in-home caregiving presents unique challenges in healthcare. Through a compelling blend of personal storytelling and empirical data, this article illuminates the often-overlooked daily struggles of working caregivers.
I examine how emerging technologies and care models such as remote patient monitoring and care-at-home programs can transform the caregiving experience, offering valuable perspectives for healthcare providers and health plans seeking to integrate effective care solutions.
I married a man just two months after we met, because if I didn’t, I knew he was going to die.
I met George on a dating site in March 2016 as “PuertoRicanPapi.” During our first phone conversation, I learned he had been diagnosed with Stage 4 end-stage renal disease (ESRD) and only had 18 months to live. He needed to start dialysis, but his ACA health plan wouldn’t cover it.
The Global Burden of Disease ranks chronic kidney disease (CKD) among the top 20 causes of death (Ibrahim et al., 2022). CKD is regarded as a high-stress illness due to the chronicity of the disease and the long-term treatment required. ESRD is the last stage of CKD, often caused by diabetes mellitus.
That’s a heavy thing to hear from anyone. But there was something about him that wouldn’t let me leave him alone.
The Downward Spiral
The Diabetes Domino Effect
George was a 40-year-old Puerto Rican man with diabetes, neuropathy, and ESRD. The following year, he developed non-Hodgkins lymphoma (NHL) and eventually sepsis. Over the course of our 2 years together, I coordinated his care among 10 doctors (primary care and various specialists).
His diabetes diagnosis is unclear, as some of his doctors mentioned Type 1 and others said it was Type 2. But from what I understand, before we met, a clinic had prescribed him insulin pills when he actually needed the insulin pens.
That’s a heavy thing to hear from anyone. But there was something about him that wouldn’t let me leave him alone.
Peritoneal Dialysis and the Hospital Revolving Door
That fall, George got surgery to implant a port into his belly, and then we started peritoneal dialysis (PD) from home. I set up the machine and ran it for him every night as I was taught by his nephrology team. But every month he went to the hospital because:
A1C was high,
His hemoglobin count was low (especially after chemotherapy) and he needed a blood transfusion, or
He was in pain.
He didn’t like being there because no one would let him rest, nutritionists came in to tell him how to eat properly for a diabetic and renal diet (and often those menus were contradictory), and other clinicians would come in and ask the same questions every time. I occasionally stayed overnight with him if my daughter was accounted for.
Weekends were the worst, because when he was having intense pain, he had to visit the ER for relief, of course waiting all day for his name to be called.
We also enrolled in a kidney transplant program at Emory Hospital in Atlanta, GA. Although I wasn’t a match to be a kidney donor for George, I was eligible to be in an exchange program with someone else, and they could provide a matching kidney for George. Unfortunately, the next setback negated these efforts.
Developing Cancer
George saw the dentist for pain in his mouth a few times in the fall of 2016 and spring of 2017. The dentist found an abnormality in his mouth that kept coming back.
During that last visit, George went to the hospital, they tested it and it was cancer–Non-Hodgkins Lymphoma (NHL).
He started chemotherapy later that month. His beautiful hair started shedding on the pillowcase the next day, and mourning began.
Losing his Leg
A few months later, George fell in our bathroom upstairs while I was in New York at my grandmother’s funeral. His teenage daughter was home, but downstairs. She called me two days later to tell me that he fell, and that his foot was black.
Source: Alltech Prosthetics
Type 2 diabetes often causes complications that can lead to lower limb amputation (Costa et al., 2020), and unfortunately, this is when George’s health took a turn for the worse. We went to a specialist after I got back from New York, who confirmed his left foot was broken and would probably never heal correctly, and recommended a below-the-knee amputation. George was devastated, but went through with it.
Afterward, he could still drive with his right foot, and he decided to buy a large SUV. I assisted him with getting in and out of the truck with his new wheelchair. However, we no longer slept together, because our bedroom was upstairs. He stayed on the couch for a few months until we got a hospital bed placed in the living room.
Losing Hope
Even though he was taking several prescribed high-dose narcotics, they didn’t have much effect in pill or patch form. Only medicines administered by IV quelled his suffering.
I always felt like I had to be strong, but I was at my wits end, suffering silently beside him. The last straw was when he developed gangrene on his genitalia, and it wasn’t curable. His pain intensified, and I advocated for him tirelessly by calling doctors, and researching information, but it was impossible to get pain management from any doctor in our city, so he suffered needlessly.
Multiple calls to his nephrologist and primary care doctor were never addressed, so I believed that palliative care was the only thing that would make him comfortable. In January 2018, I admitted him to hospice care, where he died a couple months later. I didn’t receive follow-up counseling afterward, but I met with my therapist a few more times until I moved out of state and back near my family to grieve.
Looking Back
The single most important thing missing from my experience that would have made things easier is access to support, which I describe in the following DECAF section.
I balanced parenting and school functions with spousal caregiving, administrative duties like tracking his medications, scheduling new appointments and conferring with health insurers, transporting my husband to multiple appointments, household responsibilities, and my full-time work as a technical writer with a Fortune 50 corporation. And I didn’t receive support from providers after his death, except for a newsletter from the hospice team every few months until a year passed.
I could have used an assistant for appointment scheduling and insurance coordination. A home health aide at flexible times to help with toileting and other ADL tasks.
Effects of In-Home Caregiving by Working Adults
During the pandemic, parents of school-aged children learned what it’s like to try balancing the role of teaching them while also managing their own work and household responsibilities. In-home caregiving was similar in my experience-–I had to juggle my work duties working from home with caring for my husband, and it wasn’t easy.
A study of the estimated 8.8 million employed family caregivers found that nearly 1 in 4 (23.3%) reported either absenteeism or presenteeism over a 1-month period due to caregiving (Fayete et al., 2023). Among those affected, caregiving reduced work productivity by one-third on average—or an estimated $5,600 per employee when annualized across all employed caregivers—primarily because of reduced performance while present at work. Productivity loss was higher among caregivers of older adults with significant care needs and varied according to sociodemographic characteristics and caregiver supports.
CareYaya Health Technologies’ data shows that caregivers spend an average of 15 to 20 hours per week on caregiving tasks. “It’s super hard to draw the line between when you’re working and when you’re caregiving when you’re WFH,” says CEO Neal K. Shah.
“70% of caregivers worldwide are women, and their average age is 49,” says Cheryl Field, MSN, RN. “So if you think about the multiple roles that a 49-year-old woman is playing between their own children, their career, their parents, their partner and the biological changes that come with menopause, you can see that caregivers are in a particularly pressure-filled time of their life. Any means by which they can reduce some of these stressors is significant.”
Stress from Multitasking
Source: Position is Everything
Caregiving influences several dimensions of the caregiver’s life, such as physical (e.g., physical health deterioration), psychological (e.g., anxiety and traumatic stress), family (e.g., roles and routines) and social (e.g., leisure time and social life) (Costa et al., 2020). Caregivers under stress report high levels of depressive symptoms, anxiety, high use of psychotropic drugs, low satisfaction with life, several symptoms related to psychological stress, and low subjective health.
“In-home caregiving lends itself to both more and less stress for the caregivers,” notes Dr. Caryn McAllister of High Quality Therapy. “Caregivers who work from home can juggle responsibilities needed during the day with work, and flexibility with respect to hours can allow people to contact medical professionals, organize schedules, and ensure their loved one eats, goes to the bathroom and takes medicines on time. The extra stress can come when people don’t have the ability to transition between work and home life. People often find they can leave work at work when they go home, but caregivers who work from home just don’t get that break. Ever! It takes organization and discipline to make it work.”
Wil Thomas, Editor of the Senior Bulletin, mentions a reader named John who echoes these sentiments. John has a full-time job while taking care of his elderly mother. “It’s like having two full-time jobs,” he says. “I’m constantly juggling meetings and her medical appointments, and it’s exhausting.”
Field understands this, too. As a former chief product officer who had a senior living with her in a multigenerational setting. She highlighted that the impact of providing in-home care varies over the course of the patient’s illness. “When care needs can be anticipated and scheduled, and additional resources can be utilized to put a plan in place, the impact can be smaller. When care needs are unexpected or difficult to anticipate, the impact will be greater,” she says.
“Consider that your interrupted sleep several times a week in the middle of the night over a chronic period of time begins to have an impact on your own rest and even the ability to fall asleep with anticipated anxiety of what’s to come through the night,” Fields continues. As care needs become more demanding on working adults, often you’ll see a rise in absenteeism for scheduled and unscheduled medical needs, and a decrease in resiliency on behalf of the employee. Chronic fatigue, fear, stress and anxiety all compound and can have an impact on the health of the working adult.”
Unfortunately, these stories aren’t unique. For adults who are caring for a loved one and also continuing to work in their career, taking on these responsibilities can be stressful and lead to burnout, Field says. 60% of caregivers are also employed, and many feel the job-related stress piling up. But working from home does make a big difference, providing flexibility that in-home caregivers need.
Impact of Diabetes on Patients and Chronic Care
50% to 75% of people with diabetes have a caregiver involved in their healthcare (Fields et al., 2022). These caregivers are often partners, spouses, adult children, or siblings.
Like many chronic conditions, diabetes requires complex medical management that often requires following regimented eating plans, monitoring sugar levels, organizing daily medications, and coordinating medical care. The sicker George became, the more of these responsibilities fell on me.
Source: eClinicalWorks
The chronic care model is a multidimensional solution to the complex problem of providing care to patients with chronic health problems. The theory of this model says that a significant part of chronic care takes place outside of formal healthcare facilities (Katsarou et al., 2023).
It also states that six elements are central to initiatives to improve chronic care: community resources, healthcare system, patient self-management, decision support, service delivery system redesign, and clinical information systems. Interventions that include at least one of these elements are associated with improved outcomes for people with asthma, diabetes, heart failure, and depression. However, only patients with heart failure and depression had improved quality of life (Katsarou et al., 2023).
Flexible scheduling
Caregiving would have been impossible if I couldn’t work from home. George had 10 doctors, and that translated to roughly 3 days a week with at least one appointment. At that point, I had worked for my company for almost 20 years, which gave me unlimited sick time and lots of vacation time. I took my work laptop with me to doctor appointments, rearranged meetings, and still made time for my daughter’s activities.
Working from home gave me flexibility in managing caregiving tasks and professional responsibilities, including the ability to respond to his needs promptly, compared to me working in an office setting, or George being in a facility where staff are spread across multiple patients.
Another of Thomas’ readers, Jane, works remotely and looks after her father, who has Alzheimer’s. “Working from home has been a lifesaver,” she says. “I can attend to my dad’s needs throughout the day without compromising my work. It’s still challenging, but having that flexibility makes a huge difference.”
While working from home offers more flexibility to manage caregiving tasks, it can also blur the lines between work and caregiving responsibilities. “Many caregivers report feeling constantly “on-call,” which can lead to burnout, and that burnout affects over 33% of family caregivers who are working from home, compared to 20% who work in the office,” Shah reports.
Indeed, flexible work arrangements such as telecommuting, job-sharing, and flexible hours can help caregivers manage their time more effectively. However, since the pandemic ended, return-to-office mandates have flourished with employers who want to manage employees in person and/or fill their empty office spaces. 90% of companies plan to implement return-to-office policies by the end of 2024, according to a report from Resume Builder. Nearly 30% say their company will threaten to fire employees who don’t comply with in-office requirements.
Source: SuperStaff
But for employees who can work remotely, several caregiver pressures can be relieved. Removing the commute and a strict start or end time of an office job gives the remote employee flexibility. Fields gives some of examples:
“On mornings where there’s been a difficult night, an extra hour of sleep can make a world of difference on how the employee feels and functions that day. Being able to work from home may also make it possible to leverage telehealth appointments instead of having to physically travel to doctor’s appointments. Caregivers also have the ability to provide distant supervision and mealtime support for a loved one while working from home and don’t need to have as many outside resources coming into the home to provide that supervision or ensure meals are delivered and consumed. These small benefits relieve a lot of microstress.”
Caregiver Needs Analyzed with DECAF
A study at the University of West Attica in Greece investigated the needs of caregivers of patients suffering from CKD, stroke, cancer, dementia and multiple sclerosis (Katsarou et al., 2023). 89% of these caregivers were relatives, 50% were between 20 and 50 years old, and 19% were spouses. Researchers found themes among caregiver needs:
Caregiver training
Help with nursing home care and physical therapy
Help with financial burden from health services
Lack of reliable transport
Psychological support, including delivery via digital media and mobile devices
Social support groups
Navigating complex medical insurance
I agree with all of these points. To break it down a bit more, I’m using the DECAF framework (Fields et al., 2022), which was developed to raise awareness about caregiver responsibilities in care planning and execution during the hospital-to-home transition. Here’s how DECAF played out in my caregiving experience.
Direct Care Provision
Direct Care Provision refers to hands-on support with activities of daily living (ADLs) such as getting dressed, food preparation, toileting and physical activities, and taking the patient to healthcare appointments. It also includes nursing tasks like wound care and medication management. I was a certified nursing assistant in the 90s, and a home health aide in the 2000’s, both of which prepared me for my experience with George.
Emotional Support
Emotional Support is the empathy and compassion for the patient and caregiver.
I had no close friends nearby, and George’s family was local, but most of them were more hands-off. So as his condition took more and more of a toll on my mental health, I sought out family members, a therapist, and church groups for support and stress relief.
Social support can diminish the impact of the emotional burden and stress of care by providing solutions to problems, distractions from issues or facilitating the required healthy behaviors (Ibrahim et al., 2022). Caregivers who seek social support from family and friends experience a lesser burden of care than caregivers without solid support networks.
Seeking social support is the dominant coping mechanism for caregivers of patients undergoing renal replacement therapy (Ibrahim et al., 2022). Caregivers of chronic patients are four times more likely to be diagnosed with depression and three times more likely to seek help for anxiety issues than individuals who are not caregivers.
Being an in-home caregiver is lonely, and I lacked self-care. I’ve been working from home since 2005 so I was used to being alone, but caregiving for your spouse is a different kind of loneliness. I was losing my husband slowly as his condition got worse, and I needed social support. I mostly relied on my family (long-distance phone calls) and a local church group. In less than a year, I shifted from being a newlywed with an independent husband to a caregiver. My marital needs were not met, as George lost sexual function early on. This also caused strain on our relationship.
I’m not alone. A study on psychological health from Savitribai Phule Pune University in India confirms that dysfunctions caused by chronic illnesses aren’t limited to the patient, but affect the partner, and the couple’s dynamic, making a considerable impact on the satisfaction levels in the relationship (Umrigar and Mhaske, 2022). Behavioral and personality changes in the patient can overpower emotional bonds between the caregiver and the patient as well. The greater the negative effect, the greater the frequency of depression, anxiety, and somatization in the caregiver.
This study polled women caregivers about their male spouses with chronic conditions of cancer, coronary heart disease, and diabetes. They found clinically significant marital and sexual dissatisfaction. Since marital satisfaction and sexual satisfaction are closely linked, a decrease in one tends to have a serious impact on the other, and consequently, on the overall quality of life.
Care Coordination
Care Coordination involves initiating, managing and maintaining healthcare services and support. Managing diabetes successfully requires significant care organization and coordination of multiple types of interactions with the healthcare system. Participants in a study at the University of Wisconsin-Madison (Fields et al., 2022) frequently recognized caregiver roles in care organization, such as helping with tracking and scheduling appointments, taking notes before and during healthcare visits, and making lists of current medications.
I can concur. I took George to his appointments, acting as an administrative assistant and advocate. It was up to me to take notes, ask for what he needed, and verify or dispel inconsistent information (test results, guidance, data, etc.) between different doctors. I had a spreadsheet that the nurses loved, because it listed all the pertinent information about his medication names, amounts, prescribing doctor, reasons for taking them, etc.
Patient Advocacy
Advocacy is about empowering individuals to obtain resources. In the same Wisconsin study, several participants described experiences where the caregiver advocated on behalf of the patient when experiencing serious health complications linked to diabetes.
I was no different. As the months went on, George’s depression intensified into hopelessness and an “I don’t care anymore” attitude. So in addition to caregiving, I was also a fierce advocate for his mental health, trying to find resources to alleviate his chronic pain and help him feel more comfortable.
Financial Support
Financial support refers to help with planning and using financial resources. With rising home and institutional care costs and formal caregiver shortages, 66% of caregivers use their retirement and savings funds to pay for care (Genworth).
Source: Grants for Medical
Applying for Social Security disability payments was a huge challenge. One of the questions that caused a denial related to his unemployment status. He explained that his medications made him fall asleep intermittently and randomly, so he couldn’t work. They blamed his medication and denied his application two more times before he was finally approved. He then started receiving payments of about $700 per month.
George had no life insurance, and I didn’t receive any direct financial support until his last week of life. I wrote Facebook posts about his status while he was in hospice care, and many of my friends sent funds via PayPal and Cashapp to help me pay for the funeral.
Navigating Healthcare Systems and Insurance Complexities
Caregiving at home often leads to substantial financial strain due to the cost of medical supplies, home health aides, and necessary modifications to the home. Not to mention the daunting task of navigating health insurance complexities, from finding in-network healthcare providers, care coordination, and working with billing offices regarding Medicare and Medicaid.
Finding In-Network Medical Providers
Another huge barrier for caregivers and patients alike is finding healthcare providers within their insurance network—especially specialists like those George needed. According to a Kaiser Family Foundation study, 29% of people struggle to find new providers within their network. Providers change the insurers they participate with frequently, and the onus is on the caregiver or patient to figure out how much of their bill will be covered in any given scenario.
Source: New York Bone & Joint Specialists
I’ve had to seek therapy before I met George, not just during his illness. No matter what, it’s difficult to find an available, local provider. Once I found a therapist, we started off going to see her together, but eventually he stopped.
Thomas recommends using online directories, insurance company tools and telehealth services to find these providers. And Dr. McAllister mentions an advanced step I’d never heard of before: “If you can’t find an in-network provider for your loved one, you can obtain a single case agreement, where your company will recognize the out-of-network provider as if they were in-network.”
Decoding the Difference Between Primary and Secondary Payer Insurance
One recurring source of frustration for me was dealing with multiple billing departments about George’s insurance. The health insurance from my employer was primary, and Medicare was secondary. I made this clear for each medical provider (remember, he had 10 doctors). However, each billing department would call me to confirm multiple times based on how his claims were processed.
Source: Drive Safe Insure
The coordination of benefits between private insurance and Medicare/Medicaid is something Shawn Plummer, CEO of The Annuity Expert educates his customers about. For example, he explains that determining the primary and secondary payers can help maximize coverage and minimize out-of-pocket expenses. Additionally, exploring supplemental insurance options can fill gaps not covered by primary insurance plans.
Healthcare providers have their struggles working with health insurance companies as well. Take for example Dr. McAllister’s practice, which is in-network with Medicare and out-of-network with all private insurance companies.
“As a provider, it’s so difficult to deal with insurance, although Medicare is very straightforward and easy to work with if you abide by their rules,” she says. “If you understand that private insurance companies try to maximize profit by denying coverage, and go into the process knowing how to advocate, you won’t feel as frustrated.
Source:: Geeks for Geeks
“To add to the confusion, when people have Managed Medicare, the medicare rules apply but the private insurance manages Medicare. “I often suggest sticking to straight Medicare, not Managed Medicare, because standard Medicare tends to treat providers more fairly. Many providers won’t accept Managed Medicare because of the low reimbursement rates and bureaucracy associated with private insurance companies.”
Bert Hofhuis of Sovereign Boss in the UK says that many insurance plans, including Medicare and private insurance, have limitations on what they cover for in-home care. “For example, Medicare may cover some home health services but often does not cover custodial care.”
Dr. McAllister, Hofhuis, and Plummer shared more tips to navigate complex insurance issues:
Source: Investors
Understand the specifics of health insurance policies: Ask questions about things you don’t understand, and “seek plans that cover in-home care services, medical supplies, and home modifications to be prepared,” says Hofhuis. “It’s essential to review policy details and consider supplemental insurance to cover gaps.”
Take notes: “When dealing with insurance representatives on the phone, always write down the name of the person you speak with, information regarding the call and a reference for the call. Write everything down and email as much as possible so you have proof of everything,” Dr. Allister says.
Use HSAs and FSAs: When available, Plummer and Hofhuis recommend usingHSAs and Flexible Savings Accounts (FSAs), which can provide tax-advantaged funds that can be used for medical expenses, including caregiving costs.
Plan for long-term care: Consider purchasing long-term care insurance early to cover potential future caregiving needs.
Keep records for tax purposes: Keep detailed records of caregiving expenses, as some may be tax-deductible, potentially easing your financial burden, Plummer and Hofhuis concur.
Denise M. Brown, is Founder and CEO of The Caregiving Years Training Academy, a family caregiving agency that coordinates care across multiple systems. She shares that Medicare Part B reimburses for Caregiver Training, Community Health Integration Services and Principal Navigation Services. Family caregivers can receive these services on behalf of a Medicare beneficiary if that beneficiary cannot participate in care planning because of their illness.
“The interplay between private insurance and Medicare/Medicaid is a common source of confusion,” Shah says. “More educational resources are desperately needed to help caregivers understand these complexities, including decision trees to determine primary and secondary payers.”
Effective Care Coordination Between Health Systems
Getting Access to Supplies and Services
The healthcare system is disconnected and siloed. The complications that come with coordinating care getting medical supplies can be a hassle for caregivers. It requires time, energy, patience and diligence. I remember having to take note of each and every resource to get various supplies, whether it was for dialysis, a wheelchair, or even gauze strips.
According to AARP, nearly 75% of caregivers manage medications and medical tasks. Thomas’ reader Sarah went through a nightmare trying to get the right wheelchair for her husband. “We had to go through so much paperwork and phone calls with the insurance company,” she said.
Shah understands these frustrations. “Partnerships between tech and medical supply companies to streamline this process for caregivers would be super helpful,” he says.
Brown was also a caregiver, and shares her perspective as a provider: “We do our scheduling based on the provider’s schedule, which means working around our own work schedule. We may need to be with our patients when the nurse or home health aide comes. Because of staffing shortages, we often take the schedule that’s given even when the schedule completely derails our day.”
Improving Systems and Patient Satisfaction
Brown says that healthcare professionals can help caregivers and agencies alike by obtaining doctor orders and making effective referrals. “It’s frustrating to have to repeatedly call the doctor’s office to get an order for home health services and durable medical equipment,.” she says.
Source: Printablee
“It’s also important that the healthcare professionals know which providers have staff available. For instance, my dad received home health services with a visiting nurse. When I also asked for a home health aide, the nurse was upfront that there just wasn’t the staff available for home health aide to visit. We could work around that because my sister and I provided my dad’s personal care. Others may not have the luxury, so it’s important to know the reality of what we can expect.
Another thing to consider is the emotional effect on the patient when a provider or aide is no longer available.
For example, there was a week when neither Brown nor her sister would be available on a Friday to care for their dad. “I was waiting to hear if my dad’s home health provider could continue providing services for my dad. I waited to reconfigure my work day on Friday if I needed to provide care. I later heard back from the home health agency that benefits would continue. My dad was worried about benefits ending in part because he had formed a wonderful friendship with his nurse, and he loves her. But the system doesn’t take into account the emotional impact when services end. We miss the care, and we often also miss the care provider.”
Source: EDUCBA
Naama Stauber Breckler, Co-founder of Better Health, is trying to improve accessibility and convenience for people with chronic conditions and dependent on different medical devices and supplies. “Patients need the ability to easily discover and order medical supplies online and get an easy explanation of their insurance benefits, how to maximize them, and how to find the best products,” she says.
Dr. McAllister recommends contacting the insurance company to see what exactly is allowed (HHA, PT, OT, SLP and RN services). “Companies may try to give you less than your family needs, but your insurance company will help you understand what your rights are. Many home health companies are short-staffed, but if you know what you can get for your family member, you will be able to advocate for the best,” she says.
Addressing Caregiver Challenges with Care at Home
Some of the ways to address in-home caregiver challenges include care-at-home and Hospital-at Home programs, using RPM, employer-provided benefits and flexible work arrangements, and better health plan coverage.
The Rise of Hospital-at-Home Programs
Source: Rainbow Health
Care-at-home programs are integrated clinical programs created to deliver healthcare services that have either been traditionally provided within healthcare facilities or represent new care models for chronic disease management.
These programs typically combine remote insight into biometric data or symptoms via connected devices for remote patient monitoring (RPM) and communication with clinicians through telehealth modalities. Many care-at-home programs include in-home services such as durable medical equipment (DME), meal delivery, technical support, and therapeutics.
66% of hospitals and health systems currently offer patients a care-at-home service. Early care-at-home programs were primarily targeted at ad hoc or episodic care, often only relying on a telehealth visit. But the growing maturity of these models and the confidence of the clinical and operational leaders make it increasingly viable to treat chronically and acutely ill patients at home. The differences between these program types include the amount and type of RPM, the in-home services included, and the staffing required to operate the program.
Providing remote care at home can reduce the need for hospital admissions/early discharge, freeing up valuable hospital resources and beds and leaving patients and their families feeling supported in their own homes.
Remote Monitoring for Patients with Chronic Conditions
George’s endocrinologist recommended that he use a Dexcom device to track his blood sugar. This remote monitoring device was great for me because no matter where I was or what time it was, the Dexcom app sent my phone a notification whenever his sugar was too high or too low. It was especially helpful when I attended a conference 6 hours from home, but got his alerts throughout the day and night. His family stayed with him when I was gone, but I got the alerts.
“Remote monitoring technologies have been game-changers for caregivers managing chronic conditions,” Shah says. “… allowing caregivers and clinicians to monitor vital signs and symptoms remotely, providing peace of mind and enabling more proactive care.”
The Current Health platform helps hospitals and clinics provide healthcare services to patients in their homes. Patients can use this platform for various health conditions, including COVID-19, heart problems, pregnancy care, and cancer.
Survey respondents were confident that remote monitoring helps clinicians better understand the patient’s daily health.
Technology is essential to care-at-home programs, but the industry must embrace technology for these programs to be successful. According to another survey by Current Health and Sage Growth Partners, 51% of health system leaders cited patient engagement and adherence as a top challenge, with the most critical support service needs of clinical monitoring (54%), logistics (53%), and technical support (48%). In addition, interoperability between your care-at-home platform and the patient’s employee health record (EHR) is critical for reducing duplicative work for providers and ensuring you have a holistic view of the patient during and after their care-at-home experience.
RPM makes healthcare more accessible, as patients are monitored in their homes. Facing challenges such as high care costs, reduced revenue, and limited capacity, care at home is a cost-effective site of care that can provide better patient outcomes and satisfaction.
Employer Support
Employers can help by providing flexible work arrangements, paid leave, and Employee Assistance Programs (EAPs) that offer counseling, legal help, financial advice, and referrals to eldercare services.
Source: Academy to Innovate HR (AIHR)
In-home caregiving can significantly impact an employee’s ability to manage their work responsibilities. Logan Mallory, VP of Marketing at Motivosity offers flexible work arrangements, like reduced or flexible work hours, to help alleviate the stress of balancing caregiving and work duties. This flexibility allows employees to be present for their loved ones while still fulfilling their work commitments.
Motivosity also offers their employees unlimited paid time off (PTO), health savings accounts (HSAs), and comprehensive health insurance to support our caregiving employees, each of which benefits the employees who are also caregivers in specific ways:
Unlimited PTO ensures that employees can take the necessary time off without worrying about exhausting their leave.
HSAs help cover the costs of medical supplies and services, providing financial relief.
Health insurance plans that cover a wide range of services, including in-home care, which helps employees manage caregiving expenses more effectively. They also provide access to counseling services, stress management resources, mental health apps and gym access.
“While we can only do so much, employers should strive to provide as much support as possible to caregiving employees,” Mallory says. “By offering flexible solutions and understanding their unique challenges, we can help them manage their responsibilities more effectively.”
Health Plan Changes Needed
Insurance Coverage Gaps
Source: Jackson Insurance Brokers
In the U.S., patients and their caregivers could benefit from closing the following health insurance coverage gaps in their health plans:
Long-Term Services and Supports (LTSS): According to theHHS, 70% of people over 65 will require some type of LTSS, which is not covered under Medicare or most private health insurance plans.
Home and Community-Based Services (HCBS): There’s currently limited coverage for services that help with ADLs and care at home.
Caregiver Support Services: Lack of comprehensive coverage for services that directly support family caregivers, such as respite care, training, and counseling in some states.
Non-Expansion States: In states that have not expanded Medicaid, many low-income adults fall into a coverage gap, being ineligible for both Medicaid and Marketplace subsidies (Drake, et al., 2024).
10 Ways Health Plan Changes Can Support Caregivers
Source: Ramsey Solutions
Expand Medicaid Coverage: Adopting Medicaid expansion in all states could provide coverage to approximately 2.9 million uninsured adults, including many caregivers (Drake et al., 2024).
Integrate Caregiver Support: Incorporate caregiver support services into existing health care delivery models and value-based care programs.
Enhance LTSS and HCBS Coverage: Expand coverage for these services under Medicare, Medicaid, and private insurance plans to reduce out-of-pocket costs for families.
Improve Remote Care Options: Expand coverage and availability of remote patient monitoring and telehealth services to support both patients and caregivers. Hospital-at-Home programs should be a mainstay in health plan coverage. These programs are customer-centric, result in lower hospital readmission rates, increase hospital capacity, and reduce issues with resource allocation among clinical staff.
Develop Caregiver-Specific Insurance Products: Create insurance plans or supplemental coverage options designed to meet the unique needs of caregivers.
Enhance Workplace Policies: Encourage employers to offer flexible work arrangements and maintain health insurance coverage for employees who are caregivers (Tingey et al., 2020).
Improve Caregiver Identification and Assessment: Implement systematic processes in healthcare settings to identify, assess, and support caregivers.
9. Include Caregiver Metrics in Quality Measures: Incorporate caregiver experiences and outcomes into healthcare quality measurements to incentivize better support.
Prepare Healthcare Professionals: Enhance training for healthcare providers on person- and family-centered care to better support caregivers. Psychoeducational information (e.g., treatment, lifestyle, etc.) and healthcare (e.g., emotional support, practical services, etc.) were the most common unmet need domains across health conditions (Thomas et al, 2023). Addressing unmet informational or healthcare needs may help optimize outcomes and care for children and families living with common chronic health conditions.
By addressing these gaps and implementing these improvements, the U.S. healthcare system could significantly enhance support for both caregivers and patients by reducing the financial and emotional burden on families while improving overall care outcomes.
Supporting Caregivers and Their Families
Source: Caryfi
As we’ve explored throughout this article, home care programs and RPM offer transformative benefits for both patients and caregivers. These solutions provide enhanced flexibility, improved care coordination, crucial support for managing chronic conditions and reducing caregiver burden. Expanding health plan coverage for these programs is not just beneficial, but necessary.
Hospital-at-Home (HaH) programs, in particular, represent a cost-effective, patient-centered approach that deserves widespread adoption. Every health institution could likely benefit from such a program to increase the capacity of their facility, enhance customer-centricity and patient satisfaction, and promote better patient outcomes. It’s the way of the future, and the way patients want to receive care. So we call on healthcare providers and health plans to prioritize the inclusion of care-at-home programs in their coverage.
By supporting caregivers and improving patient outcomes, we can create a more efficient, compassionate healthcare system. This requires a collaborative effort from healthcare providers, insurers, policymakers, and technology innovators to truly enhance the caregiving experience and, ultimately, the quality of life for both patients and their dedicated caregivers.
References
Carter, K., Blakely, C., Zuk, J., Brittan, M., & Foster,C. Employing Family Caregivers: An Innovative Health Care Model. Pediatrics. 2022; 149(6), 1-4. doi.org/10.1542/peds.2021-054273
“Compensation For Caregiving.” Colorado Respite Coalition, https://coloradorespitecoalition.org/family-caregivers/compensation-for-caregiving.php. Accessed 2 July 2024.
Costa, S., Ferreira, J., Leite, Â., & Pereira, M. G. (2021). Traumatic stress as a mediator of quality of life and burden in informal caregivers of amputees due to diabetic foot: a longitudinal study. Health Psychology Report, 9(4), 339, 345. https://doi.org/10.5114/hpr.2020.101495
Drake, P., Tolbert, J., Rudowitz, R, & Damico, A. “How Many Uninsured Are in the Coverage Gap and How Many Could be Eligible if All States Adopted the Medicaid Expansion?” KFF, 26 Feb. 2024, https://www.kff.org/medicaid/issue-brief/how-many-uninsured-are-in-the-coverage-gap-and-how-many-could-be-eligible-if-all-states-adopted-the-medicaid-expansion. Accessed 2 July 2024.
Fakeye, M.B.K., Samuel, L.J., Drabo, E.F., Bandeen-Roche, K., & Wolff, J.L. Caregiving-Related Work Productivity Loss Among Employed Family and Other Unpaid Caregivers of Older Adults. Value in Health. 2023;26(5):712. https://doi.org/10.1016/j.jval.2022.06.014
Favreault, M., Dey, J., Anderson, L., Lamont, H., & Marton, W. “Future Change in Caregiving Networks: How Family Caregivers and Direct Care Workers Support Older Adults Now and in the Future.” Assistant Secretary for Planning and Evaluation, 2 Aug, 2023, https://aspe.hhs.gov/sites/default/files/documents/a449863a8c93838d37f78ccf29e9231f/future-change-caregiving-networks.pdf. Accessed 2 July 2024.
Fields B., Makaroun L., Rodriguez K.L., Robinson C., Forman J., & Rosland A-M. Caregiver role development in chronic disease: A qualitative study of informal caregiving for veterans with diabetes. Chronic Illness. 2022;18(1):193, 196. doi:10.1177/1742395320949633
“How Caregiving Impacts Families, Communities and Society.” Genworth, 27 Oct. 2021, https://pro.genworth.com/riiproweb/productinfo/pdf/682801BRO.pdf. Accessed 2 July 2024.
Ibrahim N., Chu S., Siau C., Amit N., Ismail R., Halim A., & Gafor, A. The effects of psychosocial and economic factors on the quality of life of patients with end-stage renal disease and their caregivers in Klang Valley, Malaysia: protocol for a mixed-methods study. BMJ Open. 2022;12(6):1-2. doi:10.1136/bmjopen-2021-059305
Katsarou, A., Intas, G., & Pierrakos, G. Investigating the Needs of Caregivers of Patients Suffering from Chronic Diseases: A Mixed-Method Study. Indian Journal of Palliative Care. 2023; 29(3), 285-286. https://doi.org/10.25259/IJPC_179_2022
Khurana, Sanjay. “Caregiver Support | Gaps, Opportunities and Emerging Models in Healthcare.” Linkedin, 19 Oct. 2023, https://www.linkedin.com/pulse/caregiver-support-gaps-opportunities-emerging-models-sanjay-khurana. Accessed 2 July 2024.
Smith, Morgan. “90% of companies say they’ll return to the office by the end of 2024—but the 5-day commute is ‘dead,’ experts say.” CNBC, 11 Sept. 2023, https://www.cnbc.com/2023/09/11/90percent-of-companies-say-theyll-return-to-the-office-by-the-end-of-2024.html. Accessed 26 June 2024.
Thomas S., Ryan N.P., Byrne L.K., Hendrieckx C., White V. Unmet supportive care needs of families of children with chronic illness: A systematic review. Journal of Clinical Nursing. 2023; 32(19-20): 7101. https://doi.org/10.1111/jocn.16806
Tingey, J.L., Lum, J. Morean, W., Franklin, R., & Bentley, J.A. Healthcare Coverage and Utilization Among Caregivers in the United States: Findings From the 2015 Behavioral Risk Factor Surveillance System. Rehabilitation Psychology. 2020; 65(1), 63-71. http://dx.doi.org/10.1037/rep0000307
Umrigar D, Mhaske R. Psychological Health of Wives’ of Patients with Chronic Illnesses. Journal of Psychological Research. 2022;4(1):1-2. doi:10.30564/jpr.v4i1.3879
Disclaimer: This article has affiliate links. If you sign up using my links, I may receive a small commission at no cost to you. Thanks for your support.
Are you tired of pouring your energy into creating content, only to hear crickets? You share your expertise, post consistently, and follow all the “best practices,” but your message still gets lost.
The market is oversaturated with low-quality thought leadership. More than half of your potential clients scroll past the very content designed to attract them.
It’s a sea of sameness out there, and most consultants and coaches are drowning in it.
In this article I’ll give you a clear framework for a contrarian content strategy that challenges assumptions, builds real authority, and helps you become the only choice for your ideal clients. Forget the generic playbook; it’s time to build a unique perspective that wins attention and converts followers into high-value clients.
Before we build a new strategy, we need to understand why the old one is broken. Most content fails not because the author lacks expertise, but because the approach is flawed from the start. It blends in when it needs to stand out.
The sea of sameness
Most content from consultants sounds eerily similar. It’s a mix of recycled quotes, generic tips, and popular opinions that everyone else is already sharing. This creates an “authority gap,” or a space where you’re producing content, but it isn’t building any real authority or trust with your audience. Decision-makers are looking for sharp, original insights, but they are mostly finding bland, repetitive advice.
This goes to show that clients want valuable insights but rarely find them. Your opportunity is to be part of that top 15%.
Fear of a unique point of view
Why does so much content sound the same? Often, it comes down to fear. Many professionals worry that having a strong, different opinion will alienate potential clients. They stick to safe, agreeable topics to avoid rocking the boat. They post platitudes like “consistency is key” or “culture matters” because no one can argue with them.
But here’s the truth: if no one can disagree with you, no one will remember you either. You want to stop the scroll after all. Playing it safe is the fastest way to become invisible. The very thing you’re afraid of—standing out—is exactly what you need to do to attract the right clients.
I learned this lesson the hard way.
My contrarian experience on LinkedIn
A few years ago, I was posting on LinkedIn multiple times a week, sharing the same productivity tips, the same “Monday motivation,” the same advice everyone else was recycling.
My engagement was dismal. I had 1,200 followers or so, and most of my posts got 8 to 12 likes from the same people.
Source: Dreamstime
Then I took a chance and wrote a post on the premise of, “Stop telling your team to ‘work smarter, not harder.’ It’s lazy advice that helps no one.” I was so nervous, I almost deleted it three times before publishing it.
But within 2 days, that post had 47 comments, where half of them agreed with me, and the other half were furious with me or trolling.
But you know what? I got four DMs from potential clients who said something to the effect of, “Finally, someone gets it.”
That uncomfortable post taught me something crucial: the content that scares you a little is often the content your ideal clients are desperate to find. Some people will be repelled from you, and some people will feel a connection and be more drawn to you, and that’s what you need! But you’ll never know if you keep hiding your contrarian views and unpopular opinions.
Is the customer always right for real?
Consider the marketing industry. For years, the mantra was “the customer is always right.” Bob Hoffman, a writer and speaker known as “The Ad Contrarian,” built his entire brand by challenging that idea. He argues that focusing solely on customer demands can lead to bad business decisions.
His provocative stance has earned him a massive following and established him as a key voice in advertising, proving that a strong viewpoint attracts a loyal tribe.
Don’t play it safe
I get it—taking a stand feels risky, especially when you’re trying to build your business. I once had a colleague tell me, “You’re going to alienate half your potential market.” My response? “Good. I only want to work with the half that thinks like I do.” You WANT people to take sides on your content, not just scroll past your ho-hum content.
What I’ve noticed after working with coaches and consultants is the ones who play it safe don’t just blend in—they actively repel clients. Decision-makers aren’t looking for someone who agrees with everyone. They’re looking for someone who has the confidence to tell them what they need to hear, not what they WANT to hear.
The irony? By trying not to offend anyone, you become forgettable to everyone.
The focus on tactics over substance
The final nail in the coffin for generic content is the obsession with tactics over substance. Social media platforms push new formats daily—carousels, polls, short-form videos—and consultants scramble to keep up. They spend hours designing a perfect-looking carousel but only minutes thinking about the core idea it communicates.
Source: Behance
The format is just the container; the idea is the magic. A weak idea in a fancy package is still a weak idea. A powerful, contrarian idea, even if it’s just plain text, can stop a person mid-scroll and make them think. You need to spend less time worrying about the how (the format) and more time on the what (the message).
According to the Content Marketing Institute’s 2024 report, the most successful B2B marketers are those who prioritize building an audience and providing valuable, substantive content over simply increasing brand awareness through tactical execution. They found that 78% of top performers focus on the audience’s informational needs first and foremost.
If the problem is generic, safe, and tactical content, the answer is to be original, brave, and strategic.
What is a “Contrarian” Content Strategy?
A contrarian strategy is about providing a genuinely unique and valuable perspective that challenges a common belief in your industry.
The core of a contrarian approach
Source: Express Writers
At its heart, a contrarian content strategy involves three simple steps:
Identify a widely held belief in your field (a “sacred cow”).
Present an opposing or different viewpoint based on your unique experience and expertise.
Back up your new perspective with logic, data, stories, or evidence.
Instead of adding another voice to the chorus, you become the person who makes the audience pause and reconsider what they thought they knew. You lead the conversation instead of just participating in it.
Source: Artofit.org
Adam Grant, an organizational psychologist and bestselling author, exemplifies this. In his book Think Again (affiliate link), he champions the idea of “intellectual humility” and argues against the common wisdom of “sticking to your guns.”
His entire platform is built on the contrarian idea that the smartest people are those who are constantly questioning their own beliefs. This approach has made him one of the most influential thought leaders in his field.
The benefits of a differentiated position
When you bravely adopt a contrarian view, you immediately separate yourself from the competition. This differentiation comes with powerful business benefits that go far beyond just getting more likes on a post, because you:
Attract higher-quality clients: People who resonate with your unique perspective are more likely to be your ideal clients. They aren’t just looking for any service provider; they are looking for your specific approach.
Command higher fees: A unique point of view creates a category of one. When you’re the only person who does what you do in the way you do it, you’re no longer a commodity. This gives you pricing power.
Build a memorable brand: People forget generic advice. They remember bold ideas that challenge them. Your contrarian stance becomes your brand’s signature.
Customers don’t just buy a service; they buy a unique perspective and the results it promises.
A Framework to Build Your Contrarian Content
Developing your contrarian voice is a repeatable process. You don’t need to wait for a lightning bolt of inspiration. You just need a framework to help you mine your own expertise for the gold that’s already there.
Identify the industry’s sacred cows
Source: Inc.com
Every industry has “sacred cows,” or ideas that are repeated so often they are accepted as fact without question. Your first job is to find them. These are your greatest opportunities.
Ask yourself these questions to start brainstorming:
What common advice in my field do I secretly disagree with?
What are clients constantly told to do that rarely works?
What popular trend do I think is a complete waste of time?
What “best practice” is actually just a common practice, not the best one?
A leadership coach might write down: “The belief that leaders should always have an open-door policy.”
Make a list of at least 10 ideas, and don’t filter yourself—this is for your eyes only.
In the world of project management, the dominant belief for years was that detailed, long-term planning (the “waterfall” method) was the key to success. Then a group of software developers introduced the “Agile Manifesto,” a contrarian document that argued for flexibility, collaboration, and responding to change over following a rigid plan.
Once you have your sacred cow, your next step is to build the case against it. You can’t just say, “That’s wrong.” You have to explain why it’s wrong and present a better alternative to establish your credibility.
Let’s use our example: “The belief that leaders should always have an open-door policy is flawed”:
Your contrarian argument could be: “An always-open door policy destroys a leader’s productivity, encourages dependency in their team, and prevents them from doing the deep strategic work they were hired to do.”
Your better alternative: “I propose a ‘structured access’ policy, where leaders schedule specific, predictable office hours. This respects the leader’s time while still ensuring the team feels supported.”
Your argument must be backed by evidence. Use your own client stories, data you’ve collected, or industry statistics to support your new way of thinking.
I developed my version of this framework after watching a executive coaching client burn out. She was brilliant, but her open-door policy meant she was managing everyone else’s crises instead of leading them.
When I suggested that she limit her access to scheduled time blocks, she was horrified. “Won’t my team think I don’t care?”
But we went ahead and tested it for a month. And you know what? Her team didn’t just survive—they thrived. They started solving problems on their own, and she reclaimed 15 hours a week for strategic thinking. Six months later, she got promoted. I’m really proud of her “glow up.”
That experience taught me that most sacred cows exist because no one bothered to question them with data.
Your job isn’t to be controversial for controversy’s sake—it’s to share what you’ve actually seen work in the real world.
A leader with a constantly open door is living in a state of perpetual interruption, which directly harms their effectiveness. You can use data like this to give your argument weight.
Create your content pillars
Source: Elevated Education
One contrarian idea is powerful, but it shouldn’t be a one-off post. You can turn your core contrarian viewpoint into three to five content pillars, which are the main themes you’ll talk about over and over again from a different angle each time.
Let’s stick with our “open-door policy” example. Your content pillars could be:
Pillar 1: The Myth of Constant Accessibility (productivity, deep work, and the role of a leader).
Pillar 2: Fostering Team Independence(empowerment, delegation, and building self-sufficient teams).
Pillar 3: The Structured Access Framework (explaining your specific methodology, office hours, and communication protocols).
Content pillars give your content strategy structure and consistency. Your audience will begin to associate you with this big idea, and you’ll never run out of things to say.
HubSpot, a leader in content marketing, built its empire on this pillar strategy. Their core idea was “Inbound Marketing,” a contrarian alternative to interruptive “Outbound Marketing.” All of their content, including blogs, videos, and courses, is organized around pillars that support this central theme (SEO, blogging, and social media).
With a solid framework in place, it’s time to take your message to the world.
Put Your Strategy Into Action on LinkedIn
Source: Dripify
LinkedIn is the perfect platformfor this strategy. It’s a professional network where decision-makers are actively looking for insightful ideas that can help them solve their problems.
How to structure a contrarian post
Your post needs to grab attention and guide the reader through your logic quickly. Here is a simple, effective structure you can use as a template:
The Hook (Challenge the Norm): Start by stating the common belief. Example: “Everyone says leaders need an open-door policy.”
The Turn (Introduce Your View): State your contrarian opinion directly. Example: “I think that’s terrible advice. Here’s why.”
The Reasoning (Explain Your ‘Why’): Use 2 to 3 bullet points or short paragraphs to explain your logic, and back it up with a quick story, data point, or personal experience. Example: “It kills your productivity, creates a dependent team, and stops you from thinking strategically.”
The New Way (Offer Your Solution): Briefly present your alternative. Example: “Instead, I teach my clients the ‘structured access’ method…”
The CTA (Engage Your Audience): End with a question to encourage discussion. Example: “What’s your take? Is the open-door policy overrated?”
Using this structure will help you stop the scroll and start a conversation.
How I figured out this structure
My first contrarian post followed this structure by accident. I was just frustrated and ranting. But when I look back at which posts drove the most meaningful conversations and client inquiries, they all followed this pattern without me realizing it.
The key is the turning point—that moment where you challenge conventional wisdom. It should feel a little uncomfortable to write. If you’re typing it and thinking, “Can I really say this?,” then that’s usually a sign you’re onto something valuable.
Instead of just saying that an open-door policy harms productivity, tell a short story about a client who was working 70-hour weeks, felt constantly behind, and was on the verge of burnout. Then explain how implementing your structured method or framework helped them cut their workweek by 20 hours while their team became more effective.
When you wrap your contrarian idea in a compelling narrative, you’re not just making a point; you’re making it unforgettable.
How to handle disagreement, push back, and build authority with discussion
Source: Elora Consulting
When you take a strong stand, you will get some pushback. This is a good thing! It means people are paying attention.
Disagreement is not a threat; it’s an opportunity to deepen the conversation and further establish your expertise. Here’s how to manage it:
Acknowledge and Validate: Start by showing you understand their point. (“That’s a great point,” or “I can see why you’d think that.”)
Reinforce Your Position Calmly: Don’t get defensive. Restate your perspective and explain your reasoning again, perhaps in a slightly different way.
Ask Questions: Turn the discussion back to them. (“What has your experience been with this?”)
By handling disagreements with grace, you show that you’re a confident, thoughtful leader, not a troublemaker trying to provoke arguments. This builds tremendous trust with everyone who’s watching (even LinkedIn lurkers).
Your Contrarian Content Action Plan
Source: Fractal Enlightenment
You now understand why a contrarian strategy works and what it looks like. But understanding something and doing it are two different things.
This section gives you the roadmap you need to implement your contrarian content strategy in the next 30 days. Let’s go!
Your first week: Finding your contrarian angle
So many coaches and consultants make the mistake of trying to find the “perfect” contrarian idea before they start.
Perfect doesn’t exist. Done beats perfect every time. (And I’m a perfectionist saying this!)
Source: Vecteezy
Days 1 and 2: The Sacred Cow Brainstorm
Set a timer for 15 minutes and complete these prompts without editing yourself:
“Everyone in my industry says ________, but I actually believe ________.”
“Clients come to me believing ________, and I have to undo that thinking.”
“The advice that makes me roll my eyes is ________.”
“If I could change one thing about how my industry operates, it would be ________.”
You should have at least 10 ideas. But don’t overthink this—write down everything, even if it feels obvious or small.
Day 3: The Validation Test
Look at your list and ask these three questions about each idea:
Source: ESIC University
Do I have evidence? (client stories, data, personal experience)
Would someone disagree with me? (if everyone would nod along, it’s not contrarian enough)
Does this connect to a real problem my clients face? (intellectual debates don’t build businesses)
Circle the 2 to 3 ideas that get “yes” to all three questions.
Days 4 and 5: Build Your Argument
Pick your strongest idea and write out:
The conventional wisdom: “Most people believe…”
Why it’s wrong: “Here’s the problem with that…”
Your alternative: “Instead, I recommend…”
The proof: “I’ve seen this work when…” (specific story or data)
Don’t write a polished post yet—just get your thinking on paper. This is your foundation.
If you need help refining your overall content approach, my article on creating a content strategy as a solopreneur walks through how your contrarian angle fits into your broader positioning.
Days 6 and 7: Draft Your First Post
Use the structure from earlier in this article: LINK TO How to structure a contrarian post
Hook: State the common belief (2-3 sentences)
Turn: Challenge it directly (1 sentence)
Reasoning: Explain why with 2-3 points (3-5 sentences)
New Way: Present your alternative (2-3 sentences)
CTA: Ask a question to engage readers
Keep it under 300 words for your first attempt. You can always expand later.
Week 2 through 4: Publishing and refining your approach
Source: Pngtree
Week 2: Publish and Learn
Post your contrarian content on LinkedIn on a day when you can monitor comments for the first 2 to 3 hours after publishing. (Early engagement signals to LinkedIn’s algorithm that your post is valuable.)
When people comment—especially when they disagree—respond within the first hour if possible. Use the framework from earlier: Acknowledge → Reinforce → Ask.
Track what happens:
How many comments? (Any post with 10+ comments is winning)
How many shares or DMs?
What specific objections came up?
Did anyone say “I needed to hear this” or similar?
These answers tell you if you’ve struck a nerve.
Week 3: Develop Your Content Pillars
Once you’ve validated your core contrarian idea with your first post, expand it into 3-5 content pillars (see the framework section earlier). Each pillar should be a sub-theme you can explore in multiple posts.
What success actually looks like (and when to expect it)
Source: Motion
Let’s set realistic expectations. Contrarian content works, but not overnight. Consistency matters.
In your first month, look for:
Engagement quality over quantity: A post with 15 thoughtful comments is more valuable than a post with 100 generic or AI-driven “great post!” comments.
The right kind of disagreement: If people are engaging with your ideas, even to disagree, you’re creating conversation.
Direct messages: When people send you DMs like “this resonates with me” or “I’ve been thinking the same thing,” you’re attracting your tribe.
Profile views: Check if more people are clicking through to learn about you after reading your contrarian posts
In months 2 to 3, expect:
Recognition: People start associating you with your specific viewpoint.
Invitations: Speaking opportunities, podcast interviews, or collaboration requests based on your unique angle.
Client conversations: Prospects mention your content in discovery calls (“I saw your post about X and thought…”).
Less effort, more impact: Your contrarian angle becomes second nature because you’re not forcing it.
The main metrics you should care about:
Forget vanity metrics like follower count or total likes. Focus on:
Inbound inquiries from ideal clients
Meeting requests or DMs asking for advice
Content attribution in sales calls (“I’ve been following your content and…”)
Speaking/writing opportunities based on your specific viewpoint
Consider amplifying your contrarian content through a LinkedIn newsletter. My guide on lead generation using LinkedIn newsletters shows you how to build a subscriber base around your unique perspective.
Common questions (and honest answers)
Source: Marin County Management Employee’s Association (MCMEA)
“What if my contrarian view is wrong?”
First, if you have evidence (client results, personal experience, data), it’s not “wrong”—it’s your informed perspective. Second, being willing to say “I was wrong” or “I’ve updated my thinking” actually builds credibility. Adam Grant built his entire brand on intellectual humility and changing his mind based on new evidence.
The only truly wrong approach is pretending to have all the answers and never evolving.
“What if I lose potential clients by having a strong opinion?”
You will, and that’s the point.
I’ve had people unfollow me after reading my content. I’ve had prospects tell me they went with someone else because they “didn’t agree with my approach.” But I’m not mad at that, because every single time, it saved both of us from wasting time in a bad-fit engagement.
Meanwhile, the clients who do hire you will already trust your methods before a sales conversation. The close rate will be higher, the projects will be smoother, and the relationships will last longer because they already know where you stand.
“How controversial should I be?”
There’s a difference between contrarian and combative. Your goal is to challenge ideas, not attack people. Ask yourself:
Am I trying to help my audience think differently, or am I just trying to get attention?
Can I defend this position with evidence and experience?
Am I being respectfully provocative or needlessly offensive?
If your contrarian stance comes from genuine expertise and a desire to serve your clients better, you’re in the right place.
“What if no one engages with my contrarian content?”
It happens, especially early on. Here’s what to check:
Is it actually contrarian? If everyone nods along, it’s not challenging enough.
Is it relevant? Contrarian for its own sake doesn’t work; it must connect to a problem your audience faces.
Are you engaging? LinkedIn rewards accounts that engage with others. Spend 15 minutes before and after posting commenting on others’ content.
Did you post at a dead time? Tuesday to Thursday, 7 to 9 AM or 12 to 1 PM in your timezone typically perform better.
Wait until you publish at least 5 to 7 posts before judging whether the approach is working. The first few are about finding your voice and testing what resonates.
“Can I mix contrarian content with other types of posts?”
Absolutely, and you should! A feed that’s 100% controversial gets exhausting. I recommend a variety of types:
60% educational/helpful posts where you give value (tactical advice, how-tos, frameworks)
30% contrarian/thought-provoking (challenging assumptions, offering new perspectives)
10% personal (stories, behind-the-scenes, failures and lessons)
This mix builds trust while keeping your unique perspective front and center. For a comprehensive approach to content variety and quality, see my article on creating consistent high-quality content.
Here’s a workflow you can adapt that takes about 90 minutes per week.
Monday morning (30 minutes):
Review which of my content pillars I haven’t posted about recently
Choose one specific angle or story
Draft a rough outline (Hook, Turn, Reasoning, New Way, CTA)
Tuesday morning (30 minutes):
Write the full post
Read it out loud (if it sounds stiff, simplify)
Edit ruthlessly—cut at least 20%
Wednesday morning (10 minutes):
Final review and post
Respond to early comments immediately
Wednesday afternoon and Thursday (20 minutes):
Continue engaging with comments
Share interesting discussion points in new comments
This method is sustainable, repeatable, and effective.
It’s Time to Change the Conversation
Source: Dreamstime
A contrarian content strategy is the way to move to your next level of growth and impact. So stop contributing to the noise. The most successful consultants and coaches don’t add to the conversation—they change it.
When you challenge the status quo with a well-reasoned, unique perspective, you build true authority, attract your ideal clients, and create a brand that is impossible to ignore. You stop being just another option, and become the only logical choice.
So, which common belief in your industry are you ready to challenge first? Your audience is waiting for your unique point of view.
References
Beck, K., et al. (2001). Manifesto for Agile Software Development. Agile Alliance. Retrieved from https://agilemanifesto.org/
Hoffman, B. (2021). How Adtech Helped To Radicalize the US. The Ad Contrarian. Retrieved from https://adcontrarian.blogspot.com/
HubSpot. (n.d.). “What Is Inbound Marketing?” Retrieved from https://www.hubspot.com/inbound-marketing
Stahl, S. (2024). B2B Content Marketing Benchmarks, Budgets, and Trends: Insights for 2025. Content Marketing Institute. Retrieved from https://contentmarketinginstitute.com/b2b-research/b2b-content-marketing-trends-research
Disclaimer: This article has affiliate links. If you sign up using my links, I may receive a small commission at no cost to you. Thanks for your support.
Out of over 260 million monthly active users on LinkedIn, only 3 million share content every week.
That means only 1% of LinkedIn users post content weekly.
Coaches and consultants know content matters, but they treat content creation like a side project instead of a core business function.
But you don’t need to be a content machine. You need a system.
This guide breaks down why most consultants fail at content consistency and provides actionable strategies to build a sustainable content calendar that actually works for your business.
There’s a massive gap between content consumers and content creators on social platforms. According to recent LinkedIn data, approximately 1% of users create content regularly, while the remaining 99% primarily consume without contributing.
This pattern is true across most social platforms, but it’s especially pronounced on LinkedIn, where professionals often hesitate to share publicly.
Most start strong, posting daily for a week or two, then vanish for months. But this pattern kills momentum, confuses your audience, and wastes the effort you already invested.
The consumption vs. creation gap on social platforms
Source: Web FX
Think about how you use LinkedIn. How many posts do you read versus how many you actually publish? If you’re like most consultants and coaches, you probably scroll through dozens of posts each week, but only share something once a month—if that. So you’re a lurker.
While 99% scroll, consume, and disappear into the feed, a tiny fraction actually shows up consistently. For consultants and coaches, this isn’t just a social media statistic—it’s a business survival issue. Without consistent content, you’re invisible. Without visibility, you have no pipeline.
A massive opportunity for solopreneurs who commit to consistency
Your competition isn’t posting either. When you commit to showing up consistently, you automatically stand out. You become the visible expert in your field while your competitors remain invisible. 80% of B2B leads generated on social media come from LinkedIn, making it a critical platform for consultants seeking new business.
Let’s take the example of a leadership coach who increased her inbound consultation requests by 340% after committing to posting 3 times a week for 6 months.
She didn’t go viral, but she didn’t need to. Just by staying consistent, she became the go-to expert in her niche of helping tech executives improve team communication.
The compounding effect of being in the visible 1% over time
Source: Startup Talky
Content works like compound interest:
Your first post might reach 200 people.
Your 10th post reaches those same 200 people plus new connections.
By post #50, your network has expanded, and past posts continue generating conversations.
Why Consultants and Coaches Struggle With Content Creation
Source: Dion Marketing
You know content matters. So why is it so hard to actually do it? The barriers facing consultants and coaches are both practical and psychological.
The “expert’s curse”: waiting for perfect insights instead of sharing practical value
As a consultant or coach, you’ve spent years building expertise. This expertise becomes a trap when you believe every post needs to be groundbreaking. You think, “Everyone already knows this” or “This isn’t profound enough to share.”
Wrong. Your audience doesn’t need groundbreaking info, they need useful info.
That basic mistake you see prospects make repeatedly? Worth sharing.
Time scarcity and prioritizing client work over business development
Source: Motion
You spend all your time serving current clients, leaving no time to attract future clients. It feels responsible. You’re honoring your commitments. But you’re also starving your pipeline.
Business professionals often struggle with time allocation, particularly around non-billable tasks that may include content creation.
The time exists. The prioritization doesn’t.
Fear of judgment from peers and potential clients
What will other consultants in your field think? What if a prospect sees your post and thinks it’s basic? What if you’re wrong about something? These fears paralyze otherwise confident professionals.
Career coach Dhairya Gangwani built an audience of over 100,000 followers on LinkedIn by consistently sharing straightforward career advice. She posts encouraging content and relatable stories that make an instant connection with her audience of other professionals seeking career guidance. Her consistent posting schedule helped her transform over 10,000 careers through her coaching practice.
Don’t worry about sounding “stupid.” Your peers aren’t your target audience, so it doesn’t matter what they think.
Lack of a clear content strategy or messaging framework
You sit down to write a post and stare at a blank screen. What should you talk about? Who are you even writing for? Without a clear content strategy, every post becomes an existential crisis.
Imagine hiring a fitness coach who posts workout tips for two weeks, disappears for a month, returns with nutrition advice, vanishes again, then suddenly shares posts about mindfulness. It makes you wonder, ‘What does this person actually do?’
Your audience faces the same confusion when your content lacks consistency.
You lose trust and credibility when you disappear for weeks or longer
Trust requires consistency. When you post regularly for a few weeks then disappear, your audience questions your reliability. If you can’t maintain a simple posting schedule, how will you handle their complex business challenges?
This applies equally to personal brands built by consultants and coaches.
More posts = more conversations
It’s simple math. If each post reaches 500 people and generates one meaningful conversation, posting once per month gives you 12 conversations per year. Posting three times per week gives you 156 conversations per year. Which scenario builds a better business?
Build a Sustainable Content Calendar System
Source: Holly Bray
Systems beat motivation every time. You need a content calendar that works with your schedule, not against it.
The batch creation method: produce multiple posts in single-focused sessions
Stop trying to create content daily. Batch creation means sitting down once or twice per month to create weeks of content at once. This approach reduces decision fatigue and improves quality because you’re creating in a focused, creative state rather than squeezing posts between client calls.
Content batching saves time and mental energy by allowing creators to set aside dedicated blocks of time to create bulk content instead of spending hours every day brainstorming and producing individual pieces.
Example: A leadership consultant who dedicates every second Friday afternoon to content creation can create 15 to 20 posts within three hours. He schedules them throughout the month and rarely thinks about content between those sessions. This system is a great way to maintain consistency.
How to identify your core content pillars based on client problems
Source: Brew Interactive
Your content pillars should mirror the problems you solve for clients:
Sales coaches: prospecting, objection handling, closing techniques, and sales mindset.
Productivity consultants: time management, focus strategies, systems thinking, and leadership efficiency.
Start by listing the 5 most common problems your clients hire you to solve. These become your content pillars. Every post should fit into one of these buckets. This framework eliminates the “what should I post about” paralysis.
Weekly versus monthly planning
Monthly planning works best for batch creators who want to front-load their content work. Weekly planning suits consultants with unpredictable schedules who prefer shorter planning sessions. There’s no wrong choice—only what you’ll actually stick with.
Consider a career coach who tried monthly planning and found it overwhelming at first. Then she switched to Sunday afternoon planning sessions where she outlines 3 posts for the week.
This kind of commitment can reduce your anxiety and improve consistency.
Time-blocking strategies to protect content creation hours
Content creation won’t happen in your “spare time” because spare time doesn’t exist. Block specific hours in your calendar and treat them like client appointments. During these blocks, close email, silence your phone, and focus only on creating.
People who use time-blocking techniques complete creative tasks more efficiently than those who try to “fit them in” throughout the day, with focused time producing both higher quality and greater efficiency.
Batch Content Creation Strategies That Actually Work
Knowing you should batch create and actually doing it effectively are two different things. Here’s how to make batching work.
The power of dedicated creation days vs. only posting when you feel like it
Source: Planly
Choose one day per month as your content creation day. Clear your calendar. Go to a coffee shop or library if your office has too many distractions. Bring your content pillar list and a simple template. Spend 3-4 hours creating.
If you need to get away from distractions, consider doing your content creation as part of a mini-retreat. Just book a hotel conference room or a study room at the library once a month, and batch-create a month’s worth of content in a single session.
Generate 30 days of content ideas in one planning session
Use this simple exercise:
List your five content pillars across the top of a page.
Under each pillar, write three common client questions. That’s 15 post ideas.
Now add three mistakes you see prospects make. That’s 30 ideas total.
This exercise takes 20 minutes and gives you a month of content.
Another variation on this is to:
Review the past month’s client calls (you should record them or take notes).
Pinpoint one lesson from each session.
Use those insights to make the next month’s content.
Voice-to-text methods for consultants who hate writing
Source: Nordic APIs
Hate writing? Stop writing, and talk instead.
Use your phone’s voice-to-text feature to record your thoughts as if you’re explaining a concept to a client. Clean up the transcript, and you have a post.
You could record 10-minute voice memos during your morning routine, say, when you’re on a walk. Speak about one topic per recording, send the audio to a transcription app (like Otter.ai), and later you can edit the transcript into 3 or 4 posts. That’s a week’s content during your daily routine.
Repurpose client conversations into valuable content pieces
Your client conversations are content goldmines. After a coaching session where you helped a client work through a challenge, write a post about the general principle you applied (without identifying details). The problem was real, your solution worked, and now you have authentic content.
Keep a “content journal” with notes about interesting client situations immediately after their calls:
Record the problem
Your approach
The outcome
This journal can provide 5 to 10 post ideas per week based on real consulting work.
Use frameworks and templates to maintain quality AND increase speed
Templates provide structure without limiting creativity.
Create 3 to 5 post templates and cycle through them. One template might be “Problem → Insight → Solution.” Another could be “3 mistakes [target audience] make with [topic].”
You could do Monday posts using a “client win story” template. Wednesday posts could be about a “common objection breakdown” using another specific template. Friday posts could follow a “tactical tip” format.
This structure makes creation faster while keeping content varied.
Overcome the Psychological Barriers to Posting
Your biggest content barrier isn’t time or skill. It’s the voice in your head saying your content isn’t good enough.
Reframe “No One Cares” thoughts into reality checks
When you think “no one cares about this,” you’re usually wrong. That thought reflects your fear, not reality. Reframe it: “Some people will find this valuable, and I’m sharing it for them, not for everyone.”
The compound interest of content: early posts build future success
Your 10th post won’t go viral, and that’s fine. Your 100th post benefits from the foundation your first ninety posts created.
Think long-term. Each post is a brick in your visible expert foundation.
Separate self-worth from post-performance metrics
Source: Blue Space Consulting
A post with 5 likes isn’t a failure. A post with 500 likes isn’t a success. The only metrics that matter for your business are conversations started and clients acquired. Everything else is noise.
Imagine an executive coach who received only 8 likes on a post about meeting management. Three of those likes led to DM conversations. One conversation led to a $45,000 coaching contract.
Wouldn’t you rather make a “low-performing” post that generates business, instead of just likes?
Reduce perfectionism and ship imperfect content
Done is better than perfect. Your audience doesn’t expect perfection. They expect authenticity and value. Give yourself permission to publish “good enough” content. You can always refine your approach based on what resonates.
Measure What Matters in Your Content Strategy
Tracking the right metrics tells you what’s working. Tracking the wrong metrics wastes time and creates false anxiety.
Move beyond vanity metrics like likes and follows
Source: Vecteezy
Likes feel good but don’t pay bills. Focus on leading indicators of business growth: profile views, connection requests from ideal clients, direct messages, consultation requests, and actual revenue from content-driven relationships.
Track consultation requests and meaningful conversations
Source: Templates.net
Create a simple spreadsheet with columns for date, post topic, meaningful conversations started, and consultation requests received. Review this monthly. You’ll quickly identify which content types drive business results versus which generate empty engagement.
Example: A business coach tracked her posts and saw that her “unpopular” tactical how-to posts generated 3X more consultation requests than her “popular” inspirational posts. This data completely changed her content strategy and doubled her client acquisition rate.
Monitor which content types drive actual business results
Not all content serves the same purpose:
Educational content builds trust.
Storytelling content builds connection.
Opinion content builds authority.
Case studies drives decisions and share social proof.
Track which types move people toward working with you.
Use LinkedIn analytics to understand your audience better
LinkedIn provides free analytics showing who views your content, when they’re most active, and what topics resonate. Check your analytics monthly. Look for patterns in which posts reach your target audience versus posts that reach random connections.
The 90-day consistency test: commit before judging results
Judging results after a few weeks or even a month is premature.
Commit to 90 days of consistent posting before evaluating whether content “works” for your business. This timeframe allows the algorithm to recognize your consistency, your audience to grow, and compound effects to materialize.
Tools and Resources to Maintain Consistency
The right tools remove friction from content creation and scheduling.
Content scheduling platforms that save time and mental energy
Tools like Buffer, Hootsuite, or LinkedIn’s native scheduler let you create content once and schedule it for optimal posting times. This separation between creation and publishing reduces daily content stress.
AI assistance for ideation without sacrificing authenticity
You could use AI to generate 5 topic ideas based on your content pillars.
Pick one idea, record a voice memo with your perspective, and use AI again to structure her thoughts into a post.
This hybrid approach speeds up creation while preserving her authentic voice.
AI tools can help generate topic ideas, create first drafts, or reframe your thoughts. Use AI as a starting point, not a replacement for your voice. Your unique insights and client experiences are what make your content valuable.
Note-taking apps to capture ideas throughout your week
Ideas strike at random times. Use a note-taking app like Notion, Evernote, or Apple Notes to capture content ideas whenever they occur.
Tag them by content pillar, or record a quick voice note. Then when it’s time to batch create your content, you’ll have a library of ideas ready.
Simple spreadsheet systems for tracking your content calendar
A basic spreadsheet with columns for date, topic, content pillar, and status (drafted/scheduled/posted) keeps you organized. Add columns for engagement metrics and business outcomes if you want deeper tracking.
Join the 1% Who Show Up Consistently
99% of consultants and coaches treat content as an afterthought, but you can choose to be in the 1% who show up consistently. The difference between consultants who struggle and those who thrive often comes down to visibility. Consistent content creates that visibility.
You don’t need complicated funnels or viral ads. You need a system that fits your life, protects your time, and delivers valuable insights to your audience week after week.
Start simple: pick two days per week to post. Batch create content in focused sessions. Use templates to speed up production. Track what drives real conversations, not just vanity metrics.
The consultants and coaches winning in today’s market aren’t necessarily smarter or more talented. They’re simply more consistent.
Disclaimer: A few photos in this article have affiliate links. So if you sign up for Canva or Styled Stock Society using my links, I may receive a small commission at no cost to you. Thanks for your support.
You’ve spent years, even decades, honing your craft. As a consultant, coach, or voice actor, you’ve developed deep expertise that shifts your clients’ businesses and projects in the best way possible.
Yet, when someone asks “What exactly do you do?” or “Why should I hire you over someone charging half as much?,” you struggle to convey the full value of what you bring to the table.
The harder you’ve worked to develop sophisticated skills, the more difficult it becomes to communicate their value to those who need them most. Your expertise has become so natural that you can’t explain it. Meanwhile, less experienced competitors win clients with flashy websites and bold promises.
The problem isn’t your skills. It’s that nobody can see what makes you special. Your knowledge stays locked in your head while prospects compare you to cheaper options.
This “invisible expertise” is a problem costing solopreneurs like you thousands in profit every month. But what if you could show prospects exactly how you think? What if they could experience your expertise before hiring you?
Not just any content—strategic content that showcases your professional expertise, unique skills and process.
The “curse” of knowledge makes your skills seem simple to you
Remember when you first started, and every project had challenges? Now you spot problems in seconds that others don’t even know exist.
The curse of knowledge is a cognitive bias where a person who has specialized knowledge assumes that others share in that knowledge.
Source: Common Craft
You’ve internalized so much knowledge that you forget how much you actually know. And the paradox of mastery is that the better you get at something, the more effortless it appears to outsiders. So when you:
Ask the exact coaching question that unlocks a breakthrough, it feels obvious.
Identify the root cause of a business problem in minutes, it seems like a no-brainer.
Deliver the perfect voiceover in one take that captures exactly the right emotion, it sounds natural and easy, like anyone could do it. (I’ve done this many times with cold reads, but it’s because I’ve worked on it for years.)
Clients can’t see the years of practice behind your work
Source: AZ Quotes
Your clients see the final result, not the journey. They don’t see the 10,000 hours of practice, the hundreds of books you’ve read, or the failed attempts that taught you what works.
Think about watching a master chef prepare a meal—they make it look effortless. The knife moves like an extension of their hand. They season without measuring. And it all comes together perfectly.
Source: The Daily Meal
But what you DON’T see are the burned dishes from culinary school. The cuts and scars from learning knife skills. The thousands of meals that came before this one.
The same is true for your expertise.
What clients don’t see are the thousands of hours of practice, the pattern recognition developed over hundreds of projects, or the intuitive leaps that come from deep experience. Your expertise has become so internalized that it’s hard to articulate all the micro-decisions and sophisticated judgments you make in your work.
Your internal mastery becomes harder to explain as you improve
The better you get, the more automatic your skills become. You don’t think about each step anymore—you just do it because that skill has become “second nature.”
This is called unconscious competence. It’s like trying to explain how you ride a bike or tie your shoes. You just… do it. Your brain has created shortcuts that work perfectly but are invisible to everyone else.
This unconscious competence is a sign of mastery. But it’s also a marketing nightmare.
Surface-level service comparisons lead to price shopping
The market compounds this problem. When prospects can’t see the difference between you and someone charging half your rate, they choose based on price. Why wouldn’t they?
Potential clients comparing services see surface-level similarities:
Your LinkedIn profile says “business consultant.” So does theirs.
Or your website offers “coaching services.” So does theirs.
Many industries don’t require a license or certification to practice that role. Anyone can call themselves a coach, claim to be a consultant, or put themselves out to be a pro voice actor. The market is flooded with people who took a weekend course and then hung out their shingle as an expert.
Source: Swift Media
As a voice actor, I remember a few times when a casting director or producer at an agency balked at my rates, saying that I was charging more than other talent. But I stuck to my guns because I know the value of what I do.
Outsiders doing comparisons between service providers think, “They all offer consulting,” “They’re all voice talent,” “They all provide coaching.” Without tangible proof of your unique expertise, you look the same on paper. So their purchasing decisions default to price, availability, or whoever has the flashiest website.
This isn’t their fault. They’re not experts in what you do. They can’t tell the difference between surface-level knowledge and deep expertise unless you show them.
The “Show, Don’t Tell” Framework for Solopreneurs
Source: The Marketing Sage
Instead of trying to tell people about your expertise, you need to show it.
Your content creation strategy should be to making your invisible expertise more visible through concrete examples, actionable insights, and tangible changes.
This framework has four components that work together to showcase your expertise naturally:
Document your process
Use before-and-after examples
Share questions that help uncover issues
Reveal the patterns that only a pro like you can spot
Document your process, not just your results
Most solopreneurs share success stories like, “I helped Company X increase revenue by 40%” or “I’ve booked 60% of my auditions this year and made over 6 figures.”
Stats like these may be impressive, but these results don’t help your prospects understand how you think or whether you can solve their specific challenges.
Instead, document your process. Thought leadership starts with revealing how you think, not just what you achieve. Show your approach, what questions you ask, which patterns you look for, how small changes create big results.
Source: Tango
For example, a management consultant might share a detailed case study walking through how they diagnosed a communication breakdown in a remote team, including the specific questions they asked, the behavioral patterns they observed, and the small interventions that created cascading improvements.
When you document your process, you’re showing prospects your analytical framework (how you approach script copy or challenging problems), and helps them recognize similar patterns in their own work.
Use before-and-after examples
Nothing shows expertise like a before-and-after example. But don’t just show the beginning and the end—people want to see the journey between them.
A few ideas:
Voice actors can share before-and-after recordings of the same script, showing how direction and technique transform a read. (But be sure to only share your reads online with permission. If the script you’re reading is confidential, don’t post it.)
Coaches can reveal (with permission) actual coaching conversations that led to breakthroughs. Note how your specific intervention created the shift to improve your client’s issue.
Consultants can share screenshots of the frameworks, worksheets, or analysis tools they’ve developed.
This transparency does 2 things:
It demonstrates your professionalism and systematic approach.
It educates your prospects about what working with you actually looks like, reducing anxiety about the unknown.
Develop diagnostic tools, sharing questions you ask and why
An amateur asks “What’s wrong?” An expert asks “When did you first notice this pattern, and what else changed around that time?”
Your questions reveal your expertise more than your answers.
So share your go-to diagnostic questions, explaining why you ask them and what the answers tell you. This shows prospects the depth of your analytical process.
Productize your expertise into interactive tools and programs that let prospects experience your value directly. Create assessment frameworks, audit checklists, diagnostic questions and courses that help potential clients understand their own situations better and improve them.
Examples:
A voice coach might create a “Voice Brand Alignment Assessment” that helps businesses identify gaps between their brand personality and their current voice talent.
A business consultant could develop a “Team Dysfunction Diagnostic” that reveals specific collaboration breakdowns.
These tools showcase your analytical frameworks while giving prospects immediate value.
Reveal the patterns only you can spot by teaching the “Why” behind the “What”
After hundreds of projects, you see patterns others miss.
Like the executive who says they need time management help but really needs better boundaries. Or the business that thinks they have a sales problem, but actually has a retention issue.
Document these patterns and share them publicly. This positions you as someone who sees beyond symptoms on the surface.
Share the principles and mental models that guide your work. Don’t just tell people what to do—explain the thinking behind your recommendations. This demonstrates depth of understanding that differentiates you from those simply following playbooks.
When you explain why certain voice inflections create specific emotional responses, why particular meeting structures improve decision-making, or why certain coaching questions unlock resistance, you show people a sophisticated understanding that only comes from true expertise.
Content Formats That Make Your Expertise Tangible
Different formats work for different types of expertise. Choose the formats that best showcase your unique skills.
Case study walk-throughs
Don’t just share a success story. Walk through your entire problem-solving process:
Start with the initial problem.
Show what you noticed that others missed.
Explain each decision point.
Include the small adjustments that made big differences.
Showcase your expertise with interactive tools prospects can use immediately.
Create:
Self-assessment checklists
Diagnostic questionnaires
Evaluation templates
Scoring rubrics
Decision trees
For instance, a voice coach could make a “Voice Brand Alignment Assessment” that helps businesses identify gaps between their brand personality and their current voice talent to generate leads.
Behind the scenes content
Pull back the curtain on your actual work process. This builds trust while educating prospects about what working with you looks like.
Record yourself analyzing a problem. Share your marked-up notes on a script or strategy document.
Whatever it is, show the messy middle part of your process, not just the polished final product. This humanizes you to foster connection with your audience.
Practical Strategies for Consultants
Your analytical process is your superpower. Make it visible using systematic content creation. Here are some ideas to add to your content strategy as a consultant.
Weekly diagnosis posts analyzing common business problems
Pick one problem you see repeatedly, and break down:
Warning signs or symptoms to look for
Questions you ask to confirm your hunches
Why it happens
Common wrong solutions
Your recommended approach
Professional consulting firms like McKinsey, BCG, and Bain demonstrate ROI through systematic case studies showing specific problem-solving approaches, diagnostic frameworks, and measurable business outcomes.
Record yourself reviewing actual data (anonymized). Describe your thought process as you spot patterns others miss, and connect seemingly unrelated issues.
This “thinking out loud” type of content is incredibly powerful for demonstrating your expertise.
Turn your best tools and frameworks into downloadable resources like email templates, meeting agendas, project plans, and analysis frameworks—anything that shows your systematic approach.
According to government contract data, top-tier strategy consultants (McKinsey, BCG, Bain) charge premium rates averaging 2-3 times industry standard. These firms justify premium pricing through systematic methodologies, proven frameworks, and documented case studies showing measurable business impact. Their success comes from demonstrating expertise through detailed problem-solving processes, not free downloadable resources.
Email scripts that show your communication expertise
Share the exact emails you use to handle difficult situations. How you deliver bad news. How you push back on unreasonable requests. How you get buy-in from resistant stakeholders.
This shows your soft skills—often the most valuable part of consulting work.
Workshop agendas that reveal your facilitation skills
Don’t just say you run great workshops. Share the actual agenda. Include timing, exercises, and the psychology behind each section.
Content Approaches for Coaches
Your ability to create breakthroughs is valuable. Make it visible through story and pattern recognition. Your content marketing strategy works best when it shows a transformation in action.
Share specific moments when a question or reframe created a breakthrough. Include:
The context and stuck point
What you noticed that prompted your intervention
The exact question or reframe you used
Why you chose that approach
The shift that happened
Common client patterns
You’ve seen the same issues hundreds of times. Create content around these patterns, along with pivotal coaching moments of specific scenarios where a particular question or reframe created a breakthrough for your client, without breaking confidentiality. This will help prospects understand your coaching philosophy and recognize their own stuck points.
Examples:
The entrepreneur whose “time management problem” is really a fear of delegation or a boundaries issue.
The executive whose “communication issues” stem from unprocessed grief about a merger.
The creative whose “motivation problem” is actually misaligned values.
The person who discovers their perfectionism actually stems from risk aversion.
These patterns showcase your ability to see beyond surface symptoms.
A Metrix Global study of a Fortune 500 company reported 788% ROI, while 86% of companies can calculate positive returns from coaching programs.
Visibility Tactics for Voice Actors
The author Daree recording a voiceover demo.
Your voice is your instrument, but your expertise goes far beyond just sound. Your voiceover content marketing should showcase your interpretive and technical skills.
Same script recorded five different ways with explanations
To demonstrate your range and technical skill, take one piece of copy and record it using five different approaches. Then explain:
The emotional target for each version
Technical adjustments you made
How you made your creative choice for each version
Why each approach works for different contexts
Which version you’d recommend and why
Content like this showcases not just your voice, but your interpretive skills and directability.
Script markup showing your analytical process
Source: Premium Beat
Share the process you go through to analyze a script.
Take a piece of commercial copy and mark it up with your notes:
Where you’ll breathe
Which words need emphasis
How your choice creates an emotional arc for the listener
This content shows the strategic thinking behind your performance that clients never see but always benefit from, and probably take for granted.
Technical breakdowns of voice techniques
Explain the mechanics behind different voice qualities and choices, such as:
Changing your tone to create warmth versus authority.
Performing different voices and then explain why you’d choose each approach for different brands or contexts.
Using physicality in your voice acting, including how you adjust based on the type of script or character you have.
Direction interpretation examples
Source: Flickside
During a recording session, clients often have a hard time explaining or describing how they want you to sound, or they don’t really know what they want, period. So this is a great opportunity for you to show how you translate vague direction into specific performance choices.
For instance, what does “Give me more energy, but not too pushy” actually mean? How do you interpret “Pretend you’re a storyteller”? Break it down.
If you can explain how to handle vague direction from a client, you show your professionalism and ability to work with almost anyone.
The Compound Effect of Visible Expertise
Source:Dreamstime
When you make expertise tangible with consistent demonstration, everything changes about how prospects interact with you:
Prospects begin to self-qualify. Your content helps them recognize whether their challenges match your expertise. You spend less time on dead-end discovery calls, and more time with potential clients who already understand your value and are likely a better fit.
Referrals become more targeted. When clients and colleagues can clearly articulate your unique expertise, they send you exactly the right opportunities.
Trust builds before the first conversation. By the time someone reaches out, they’ve already experienced your thinking and approach, so they feel like they already know you. The sales conversation shifts from proving your credibility to discussing specific ways you can help them.
Premium pricing becomes justifiable. When expertise is visible and tangible, price comparisons become less relevant. Clients aren’t buying a commodity service based on your time—they’re buying your specific talent, approach, and proven frameworks.
Moving from Invisible to Undeniable
Your invisible expertise is costing you. Every day, your ideal clients choose someone else because they can’t see what makes you special.
But you can change that!
The shift from invisible to visible expertise requires that you market yourself by creating content that shows the depth and sophistication of your work. Every piece should make someone think, “I never realized how much goes into this” or “I hadn’t thought about it that way.”
Source: Pikbest
Pick your most common client challenge or desire. Then create one piece of content that shows—not tells—how you solve it. Share your process. Reveal your frameworks. Document your thinking.
Don’t wait for perfect. Don’t overthink it. Just start showing what you know, and how well you do your thing.
Your expertise deserves to be seen, understood, and valued at the price it’s worth. The world needs what you know and what you do.
Your expertise is already extraordinary. It’s time to make it visible.
If you’re ready to make your expertise tangible and attract clients who truly value your work, let’s talk about your content strategy.
Tullis J.G., and Feder, B. The “curse of knowledge” when predicting others’ knowledge. (2022). Memory & Cognition; 51(5):1214-1234. doi:10.3758/s13421-022-01382-3